Sahina Bellydance
  • Home
  • About
  • Classes
    • Class Registration
    • Student Showcases
    • Workshops
  • Performance
    • Performance FAQ
    • Lesson Parties
    • Manavi
  • Shopping
    • Shirts
    • Costume Sale
  • Gallery
  • Resources
    • Costuming
    • Student Resources
  • Contact
  • Blog

How to Custom Fit a Hip Scarf by Melissa

11/11/2013

6 Comments

 
What you'll need:
    2 velvet hipscarves
    Matching thread
    Needle
    Pins
    Scissors
Time it'll take you: ~ 20 minutes


“One size fits all!” the tag says.
In response, I say “Bull.”
At one point, it was easier to find hipscarves in larger sizes than it was to find them smaller sizes. Now, the reverse is true. Every time I go to look for a cute hipscarf that is big enough to fit my full hips, I'm left with chintzy chiffon ones. I have looked high and low for cute velvet hipscarves that will cover my hips evenly. One year, I ended up simply buying 2 hipscarves and finagled a knotting situation. It worked, but it was a major pain to get in and out of and then I STILL had to pin them in place. After that experience, I decided to do something different. I wanted something more permanent. I wanted to be able to pick up my hipscarf like my classmates and tie it on my hips like my classmates and not have it just completely come apart. I am now going to share with you the solution I have found, so you can avoid the frustration of having a gap (whether it's a small gap or a large gap) and add extra noise!
Picture
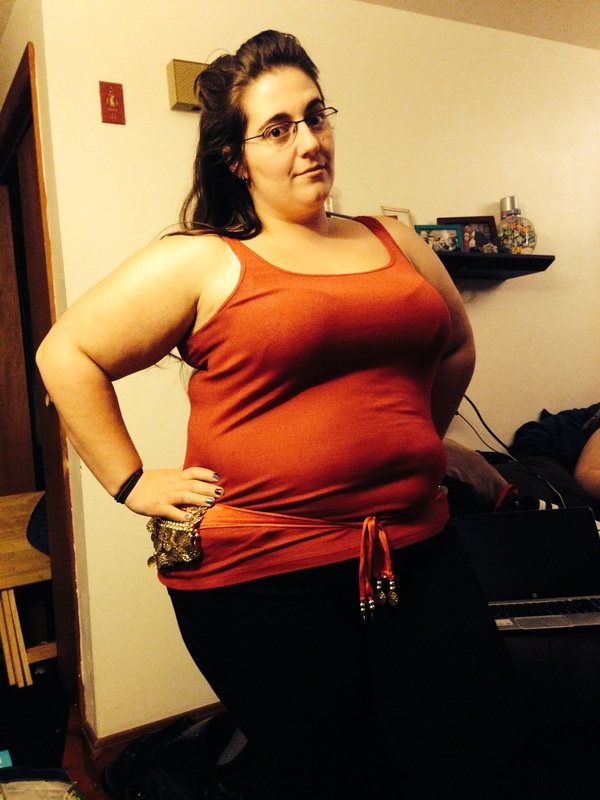
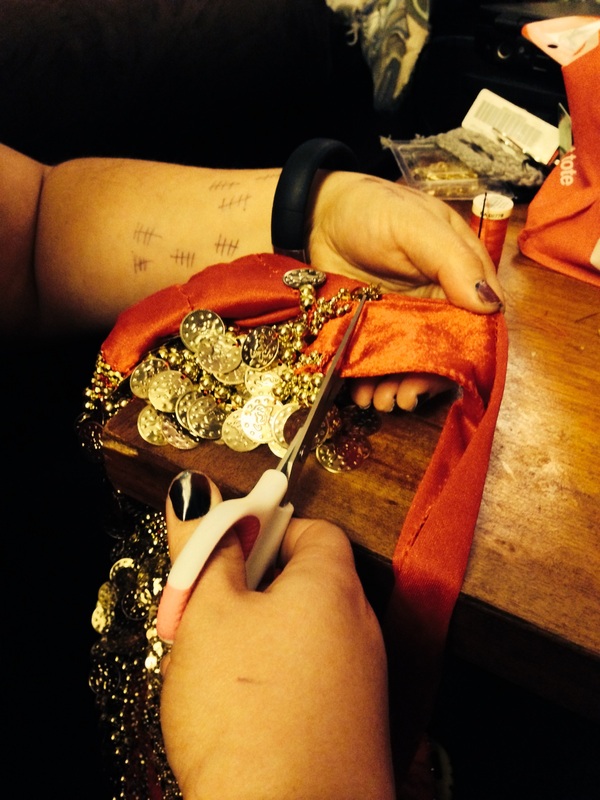
1. Acquire 2 velvet hipscarves. (I've tried the chiffon, but the chiffon takes a lot more work because of the material. It is not very forgiving when it is cut. If you do decide to use the chiffon, make sure you use plenty of Fray-Check.)

2. Place the hipscarves on your hips to see where they line up. You'll want to make sure there's a small gap (about an inch) because once you start dancing, I find that it stretches out a bit (or the knot loosens up) and tends to fall off. Pin the hipscarves together where they overlap. I like to make sure to pin them together at the part where the ties start.

Picture
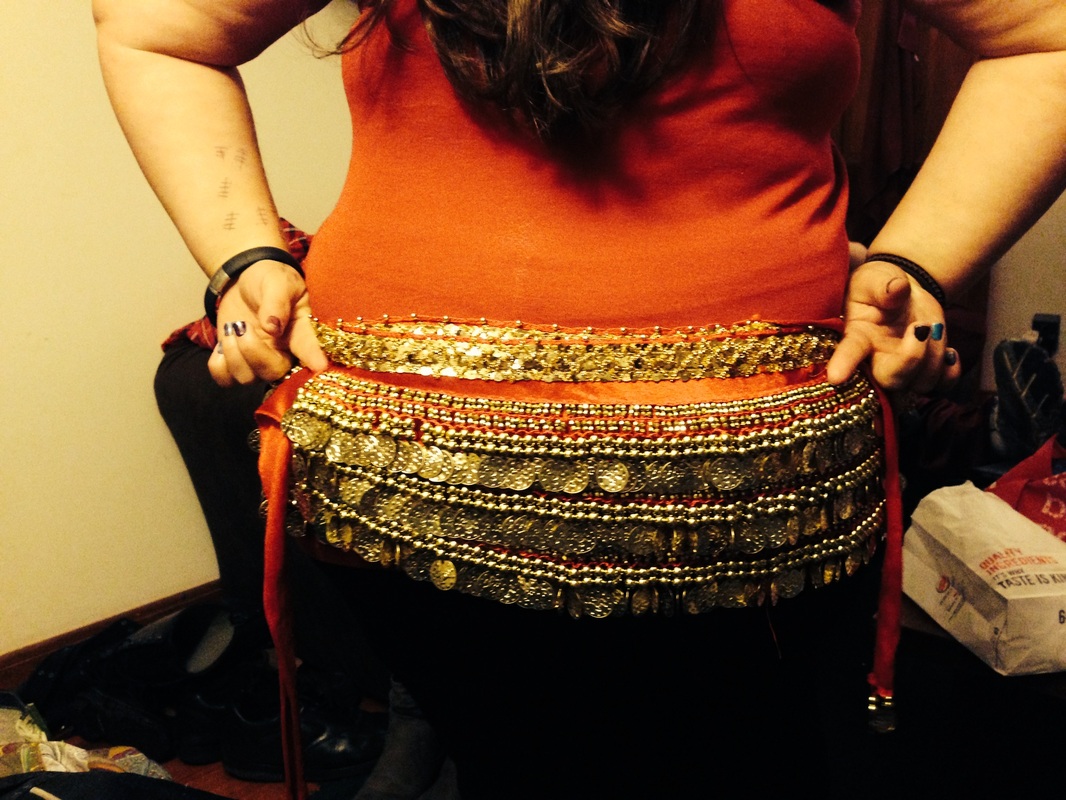
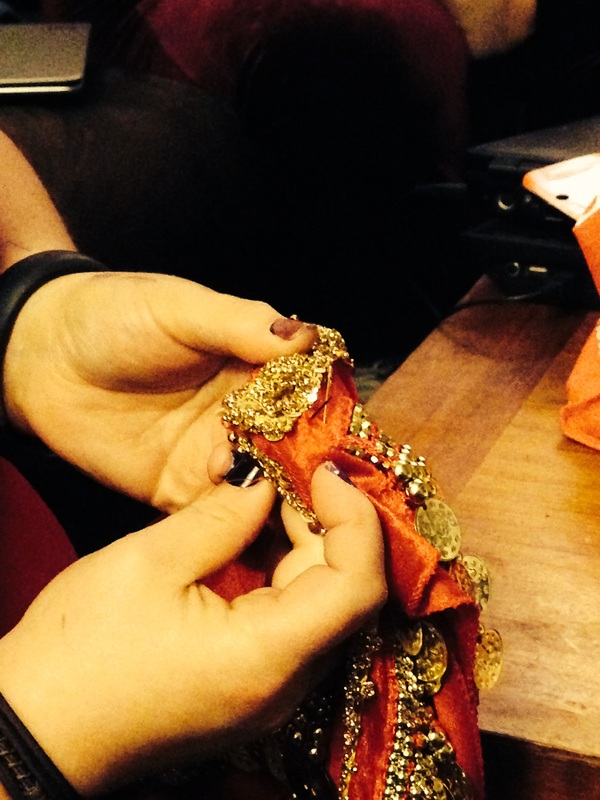
My fingers are pointing to where the pins are. Pardon the tick marks on my arm, this photo was taken on Halloween.
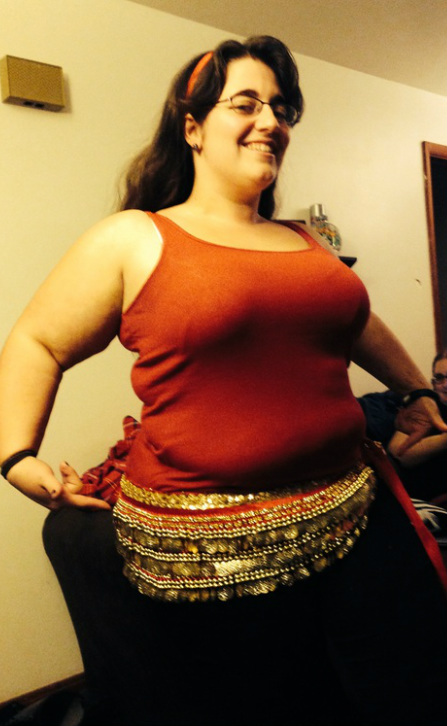
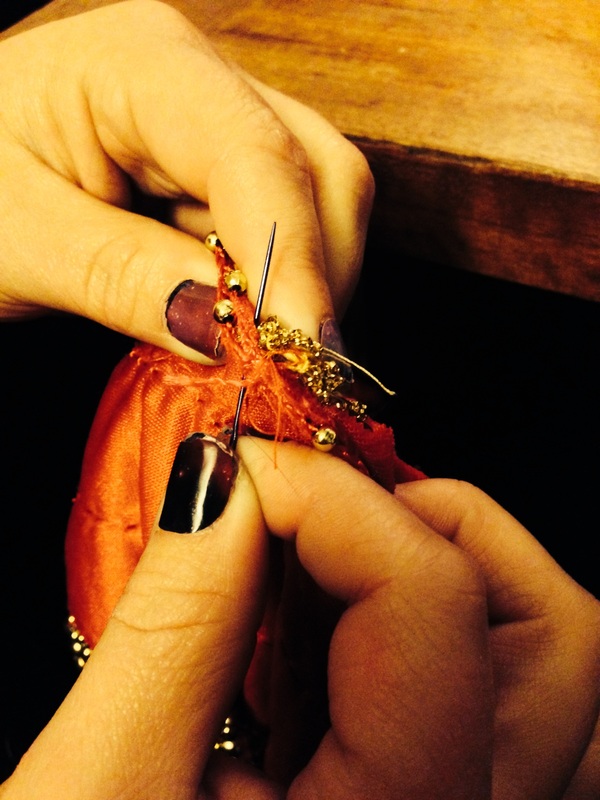
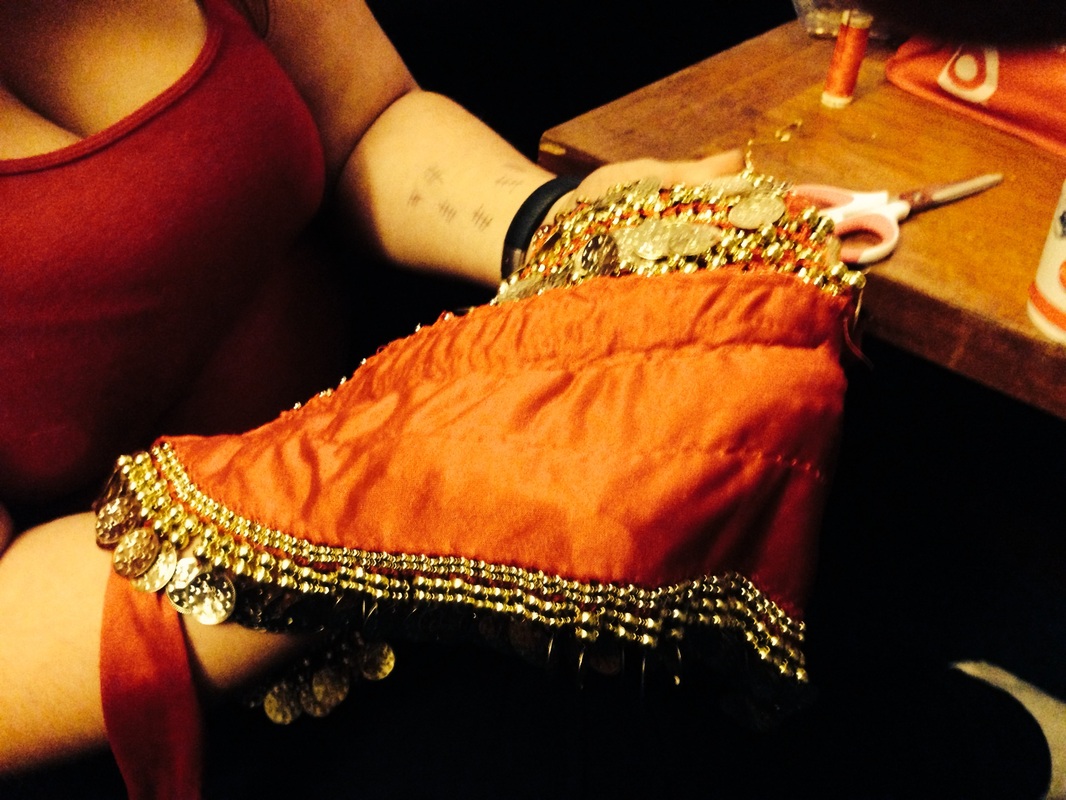
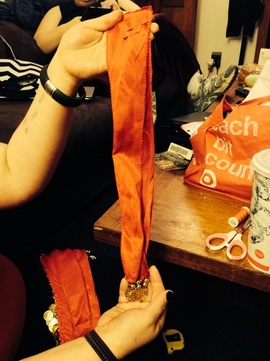
3. Take off the hipscarves and inspect the lines. Sometimes, there are extra decorations and you'll want to line them up as much as possible. The idea here is to make it look like one single hipscarf, not two.

4. I hand stitch these because the area is so small that it would take longer to pull out the sewing machine. a.) Typically, I like to do a basic stitch just under the upper band because it doesn't show as much and will still allow for the coins to move around. b.) Then, I do a quick whip-stitch on the top to help keep things looking neat and tidy (the only bits that I want flopping around are the coins!)

Click for larger images and captions:

5. Carefully, remove two of the ties so that you are left with just the normal 2 ties. I try to cut right under the coins so there is no extra velvet hanging out. Save the ties to a make a matching headband!
6. Inspect to ensure that everything is the way you want it to look. It's best to find out now while you still have everything out. Try it on, make sure it's not going anywhere.
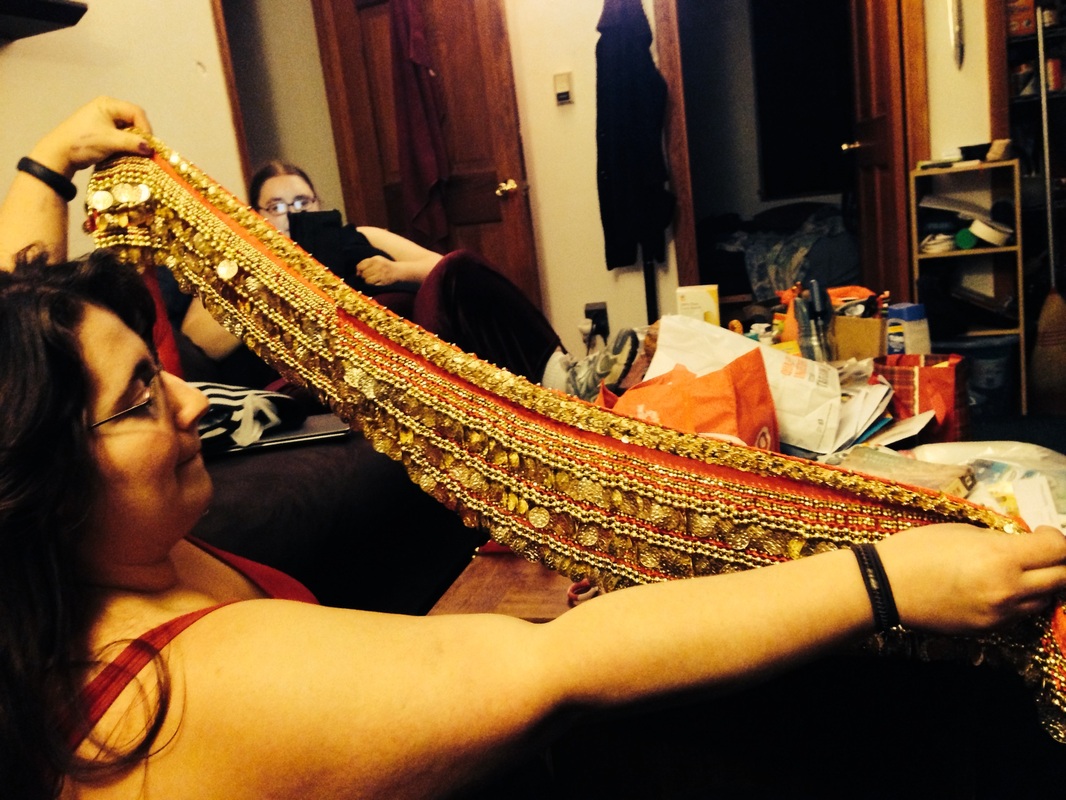
Picture


7. Now to make the matching headband, pin together those two extra ties so that the ends are equal in length. Sew as close to the edge as you can get and as tightly as possible. Then, you can tie it around your head with the coins dangling in the back. I have a large head so this should work for most people.


8. Have fun dancing with your new hipscarf!!


Picture
Picture
6 Comments
Anthea Kawakib link
11/12/2013 12:28:34 pm

good one - and you're way neater than I am :-)
I'll share with my students - thanks Melissa & Sahina!

Reply
lisa wall
11/13/2013 01:48:34 pm

Awesome, thanks for sharing. Sahina told me you do this now I get to see the process. Thanks

Reply
Melissa
11/17/2013 03:48:48 pm

Thanks, Lisa!! BTW, miss you in class!!!!

Melissa
11/17/2013 03:48:17 pm

Thanks!! I mostly use the lines that are already there to help guide my lines. I hope things work well for your students!!

Reply
Karla B
11/29/2013 05:19:23 am

Melissa, depending on sizing, are you leaving any of the main parts of the hipscarf overlapping? Or do you end up with only a single layer (if this makes sense!)?

thanks!
Karla (another student of Sahina)

Reply
Melissa
11/29/2013 08:23:55 am

Hi Karla,

I do leave some over lap. I only cut the ties off. If I were to cut through the coins, I might lose some. So, it's quite a bit heavier than just one, but it makes great noise.

Reply

Your comment will be posted after it is approved.


Leave a Reply.

    Sahina

    My adventures in dance, music, costume design...

    Picture

    Categories

    All
    Costuming
    Green Bella
    How To
    Photoshoots
    Year In Review
    Zills

    Archives

    January 2020
    June 2018
    January 2018
    April 2017
    January 2017
    December 2016
    July 2016
    June 2016
    March 2016
    January 2016
    December 2015
    October 2015
    September 2015
    August 2015
    April 2015
    January 2015
    December 2014
    January 2014
    December 2013
    November 2013
    July 2013
    May 2013
    April 2013
    January 2013
    December 2012
    September 2012
    May 2012
    February 2012
    January 2012

    RSS Feed

Tweet
Sahina Bellydance | sahina@sahinabellydance.com | 413-595-1119 
Amherst MA 01002 | Easthampton 01027 | Northampton 01060.
All Content Copyright Sahina Bellydance 2010-2020.
All Rights Reserved.

  • Home
  • About
  • Classes
    • Class Registration
    • Student Showcases
    • Workshops
  • Performance
    • Performance FAQ
    • Lesson Parties
    • Manavi
  • Shopping
    • Shirts
    • Costume Sale
  • Gallery
  • Resources
    • Costuming
    • Student Resources
  • Contact
  • Blog