|
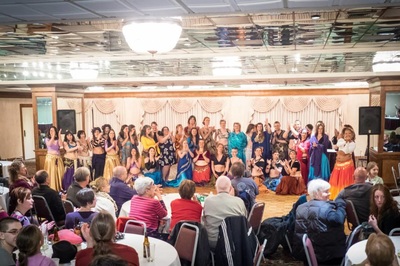
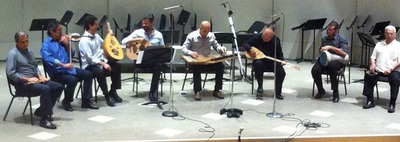
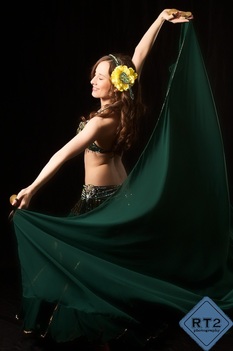
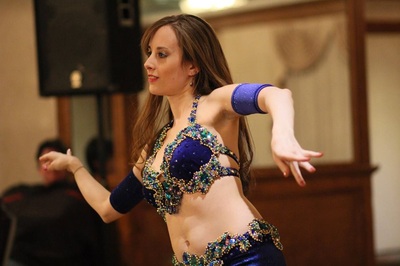
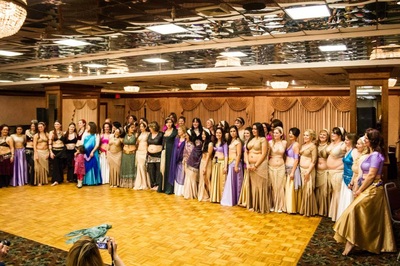
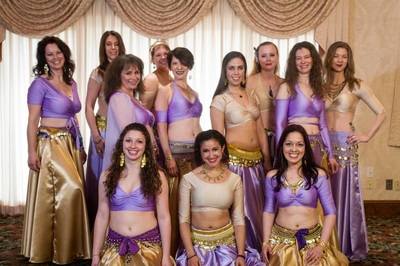
I can't believe it is the end of another year! I know it is cliche but time really does fly by. This coming spring it will be 6 years since I started my dance business. When I reflect on all of my experiences over the years with fellow dancers and students, workshops and performances, I am in awe. 2015 was another incredibly full year, both in dance and in life. Outside of dance I finished my masters degree and have begun work on my PhD. Within the dance world so many incredible people have helped make this year amazing. Here is a look back at some of my favorite memories from 2015! Teaching and Student Achievements * Taught classes on Skirt Dance, Veil, Classical Egyptian, Solo and Small Group Composition, Exploration of Bellydance Styles, and more * Avienn and Aralia have officially started the mentoring process to become professional dancers, they now join with Melissa and Lisa Wall in a new mentoring program that will begin in 2016 (they also made a beautiful website!) * Coached Carolyn and Kia on their first solo pieces * Taught at the Shimmyathon for the third year in a row! * Coached Maddi on bellydance and veil dance after she was awarded a scholarship from her college to do an intensive study- she then presented her first solo piece in August! * Contributed to Julie Eason's Belly Dance Practice Prompts book Performance * Hosted 4th annual Dancing into the Light student showcase (more pictures here) * Performed at a variety of wonderful private events for a wide range of audiences * Did an awesome Vashti Banquet performance as a duet with singer Felicia Sloin * Performed at the Raq On community day to the music of the Mosaic Ensemble * Performed at Amity Alize's 30th birthday party to the beautiful music of the Fred Elias Ensemble * Performed in Rosa Noreen's Zaman Classical Egyptian showcase to the music of Okbari Middle Eastern Ensemble * Continued as a core performer at Goddess Lounge, and performed in Cultural Chaos with the other core dancers * Danced at some super fun Halloween shows * Headlined at Cairo Cabaret, performed at other local venues including Marco Polo, Goddess Lounge, Athenian Corner Training * Attended Art of the Belly and took classes with Victoria Teel, Aziza, and Lotus Niraja on Body Percussion, core isolations, layering, and more * Attended Shimmyathon and took classes with Jeni, Amity Alize, and Aslahan * Cross trained in east coast swing * Attended Southern Vermont Dance Festival and took classes on Broadway Jazz, Jazz styles of the 50's and 60's, Sevillanas, Turkish, and Aerial Fabric * Hosted Mahin for sold out workshops here in Northampton and took classes with her on Khaleegi, Shaabi, anatomy, Classical Egyptian, and more * Studyed with Shadia, Shifah, Nadira, and Irina Akulenko on flamenco fusion, improvisation, routine structure, debke, Arabic sharqi, and more * Took a private lesson with Ansuya * Took a doumbek workshop with Raquy Danziger Other * Had a super fun photoshoot with Felicia and RT2 Photography, and met Maia Kennedy Photography along the way * Co-hosted a Hafla for Humanity, which raised $1,634.50 to contribute to the International Rescue Committee's Syrian Relief Fund * Attended the Arabic Music Retreat, Laayali concerts, and other fun live music events * Hosted the fifth annual Secret Habibi bellydance gift exchange * Emceed the Crescent Dancer's 40th Anniversary show with Avienn * Was featured on Nadira Jamal's Belly Dance Geek Clubhouse to talk about mentoring for dancers * Grew my costume collection ;) I already have some exciting things planned for 2016! I will be hosting some of my favorite New England dancers for workshops in Northampton, starting an official mentoring program for my students who have transitioned to or are transitioning to the professional realm, working on some amazing collaborations with my dance partners Felicia and Kenna, and so much more! I can't wait to dance with you all in 2016! Here are my top 4 favorite performance videos from this year!
0 Comments
The Gift of Dance
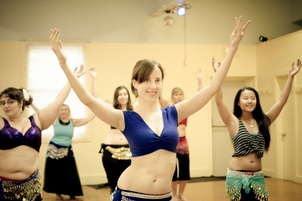
Bellydance classes are fun and rewarding, allowing you to gain a new skill set, develop an appreciation of Middle Eastern dance, music, and culture, and meet new friends. Class registrations with optional hip scarf and zill bag gift sets will be available in a few days can be purchased here. Gift certificates are available if you are registering someone as a gift. General gift certificates are available as well and allow the student to choose their own combination of classes, private lessons, or workshops and use it anytime throughout the year!
For further recommendations on music, DVDs, books, and more visit Sahina's full online store here!
Books
Julie Eason's new Practice Prompts book is a great option for guiding at home practice and Lauren's journal is a great way for students to keep track of what they are studying. There are also many fun books on bellydance history available. Feeling Crafty or Shopping for a Dancer Who Likes to Sew? Crocheted Zill Mufflers- Zill mufflers help to keep down the volume of zills so dancers can practice without disturbing the neighbors. Instructions to crochet them are available for free here. Veils- Veils are easy to make if you have a serger. Just buy a 3 yard length of light weight polyester chiffon (as floaty and light as you can find), serge a 3 yard by 45" rectangle, and you're done! Hair Flowers- Hair flowers are super fun to wear andeasy to make, plus they can be worn for dance or a night out! Canes- Easy to make and affordable, just follow this handy instructional. Headdresses- A lovely way to accessorize any costume. You can find easy to follow instructions and a materials shopping list here.
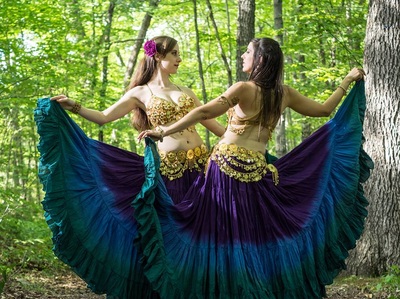
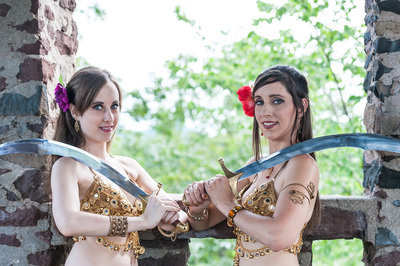
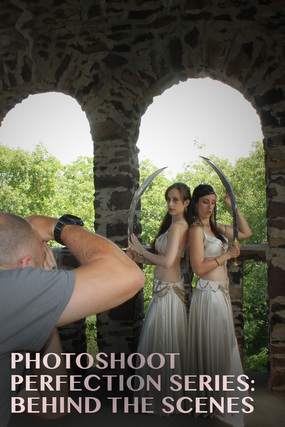
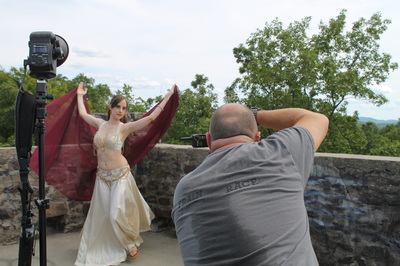
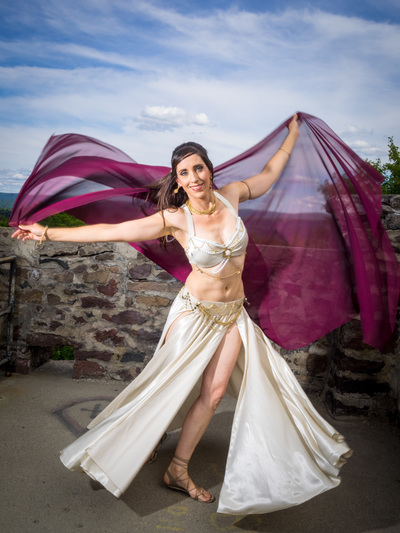
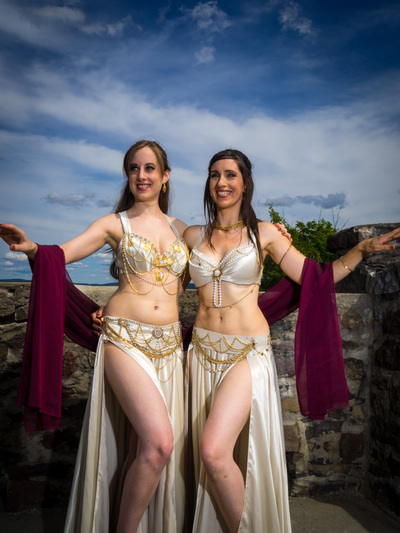
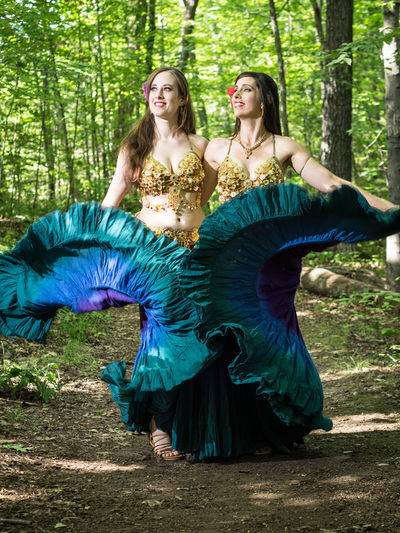
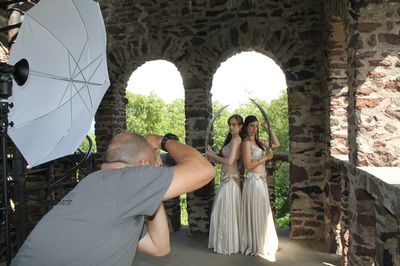
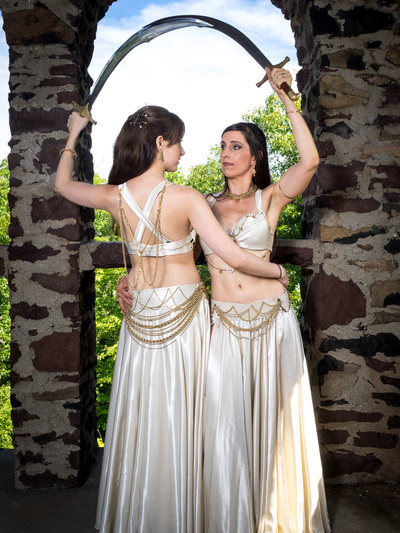
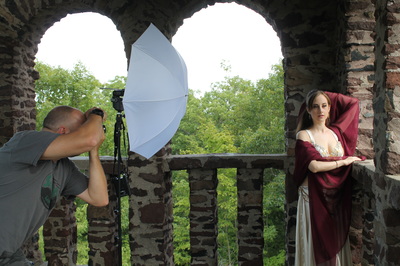
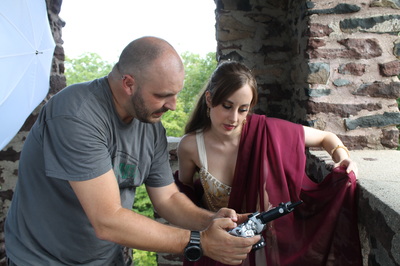
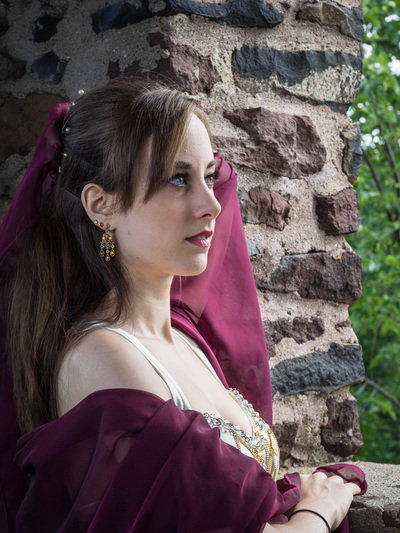
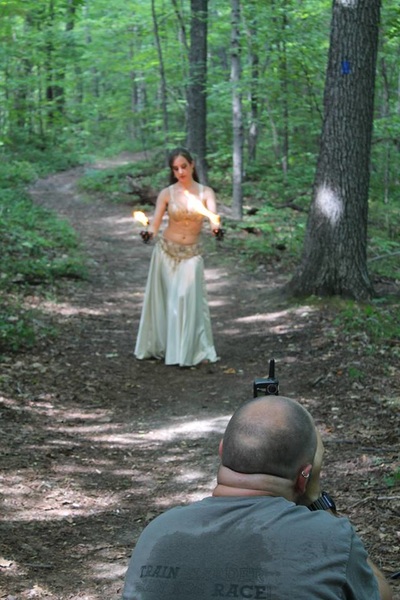
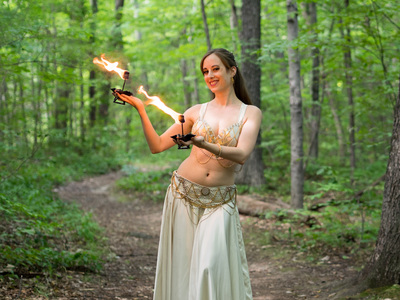
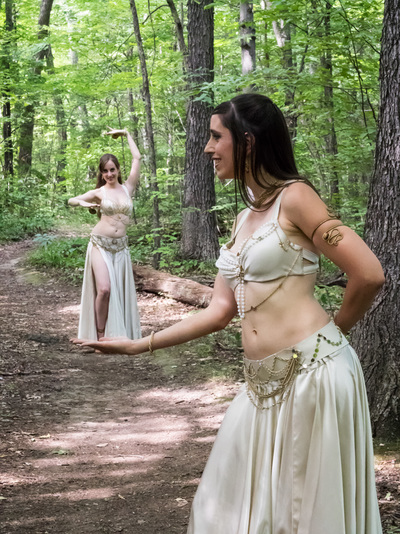
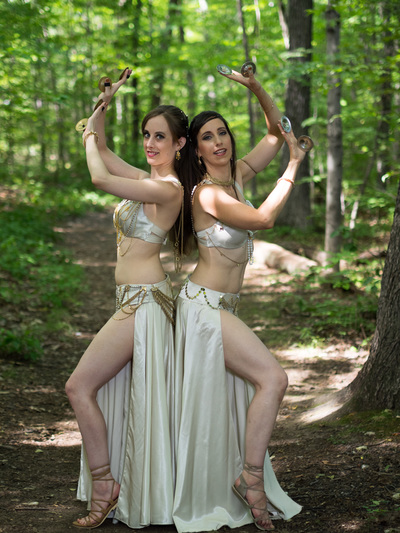
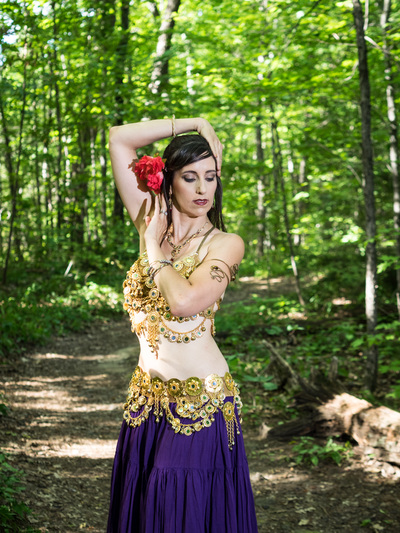
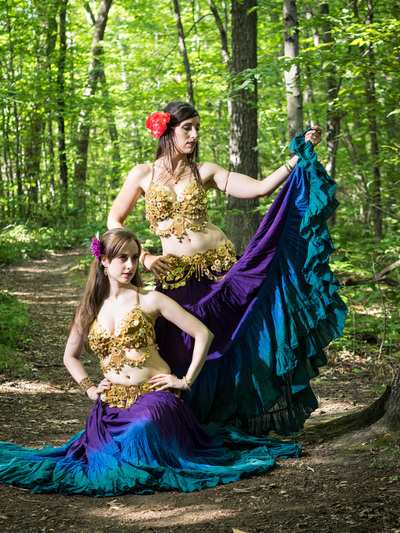
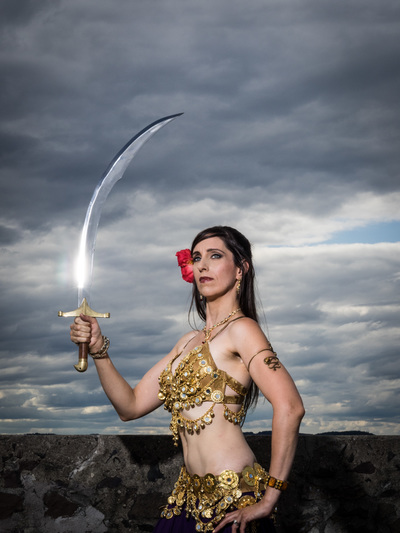
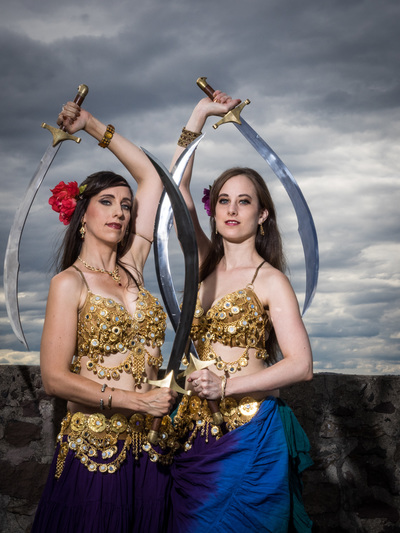
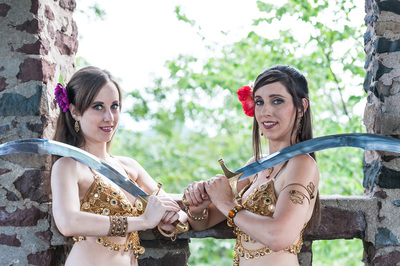
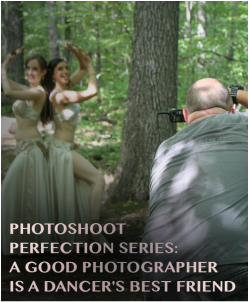
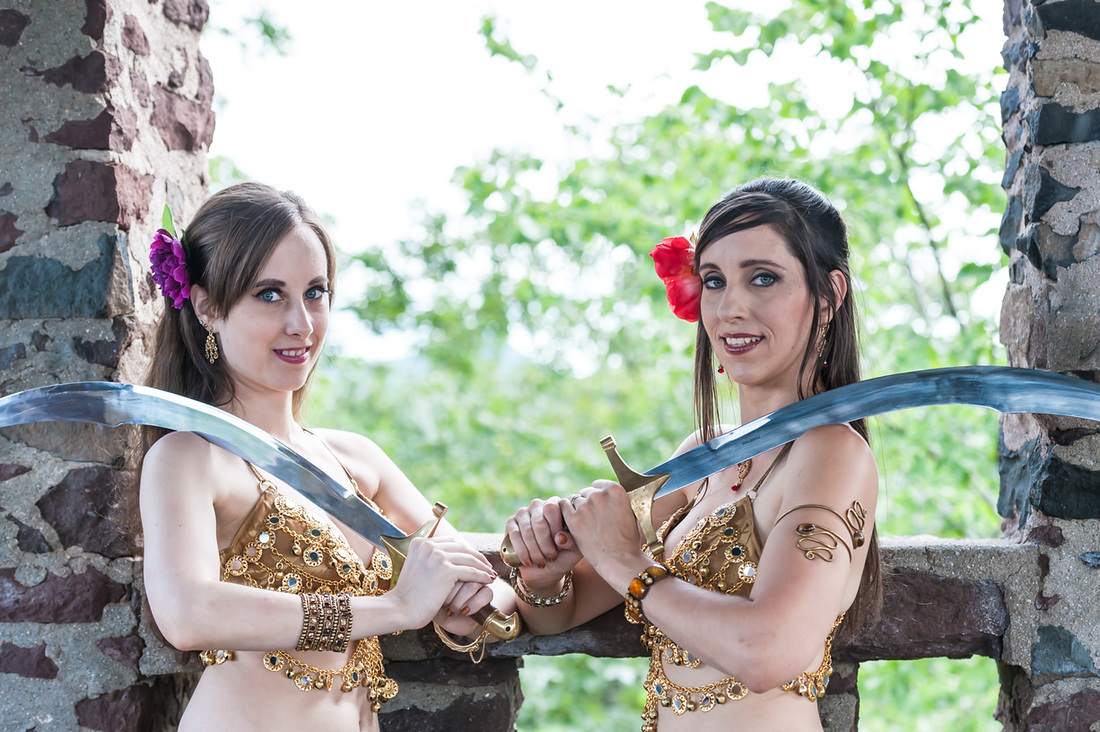
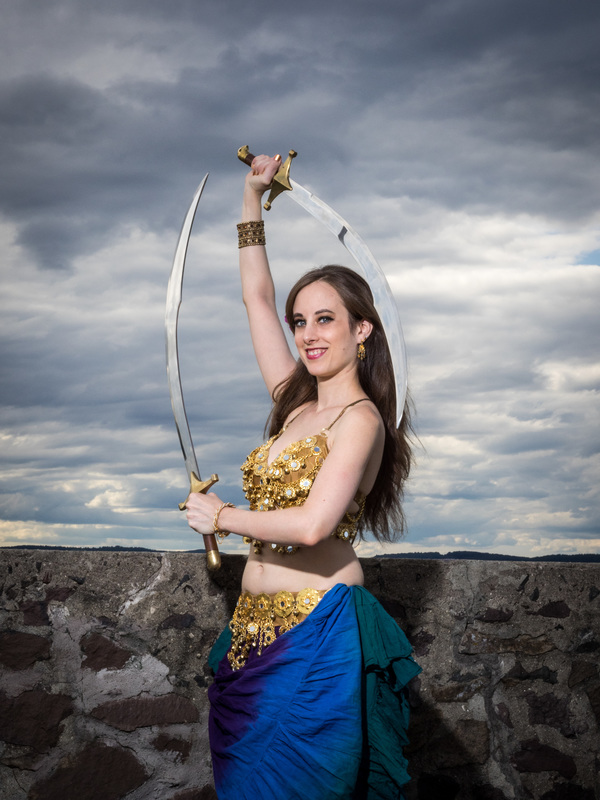
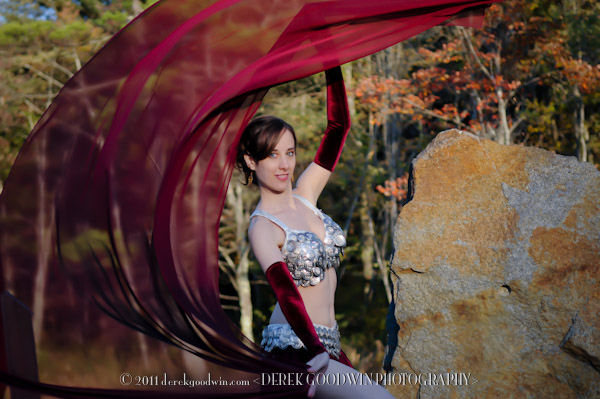
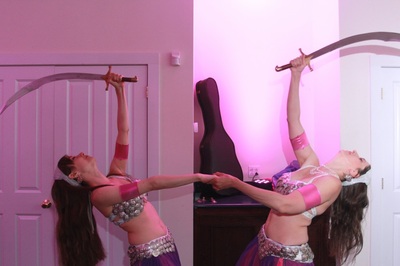
Our looks for this shoot Felicia and I hadn't done a photoshoot together since 2010 so it was really time for some updated images! We wanted to have shots using two costumes that each had a much different feel. In January, we made cream and gold chain bedlahs for a show. We first wanted to find the same fabric that we used for the beldahs to make circle skirts to create a princess-y look for the shoot. Luckily, the fabric was still available, which meant that we were able to make skirts which matched the bedlahs perfectly. For our second costume, we wanted to wear our gorgeous new hand dyed skirts made by Painted Lady Clothiers, but we needed to find a bedlah to match. For many years we had been coveting the Mid-East manufacturing coin sets, so we decided now was the time to buy them. However, that meant we needed to make new bedlahs as well. The coin parts for the bedlahs arrived on Monday and the shoot was Saturday. By some miracle, and with Felicia's costume and design ingenuity, we managed to get the entire bedlah bases done, the coins mounted, and the new ivory skirts completed in time! It had been so long since we had done a shoot, so we wanted to cover all of our bases for updated photos by getting shots with all of the props we routinely use. For us this meant zills, veils, and swords. We also dance with palm flames so we opted to include those as well. Day of the shoot Our good friend, and fellow dancer, Laura accompanied us. She was curious about doing a photoshoot as she is planning her first one for next year. I always prefer to have an assistant during shoots, even better if it is another dancer. It is ideal to have someone there to help with costuming and to give a dancer's eye to my poses and posture, so having her come along was perfect. Laura was especially helpful during costume changes by being able to create some private space in this location with the help of our vehicles and strategically placed veils. In addition, she is experienced with fire props so we did not have to prep our own fire props while in costume. This blog series was already underway so we also decided that she would take some behind the scenes photos to use in this post. We started out in the tower with our princess costumes and got veils and swords ready. It was a lot of fun using our swords to mimic the look of the arches in the tower. Next, we went to the top of the tower to get photos of our veils in the wind. Choosing deep red veils added the most contrast to the ivory costumes, blue sky, and green foliage. We also wanted to get some shots in the woods. As not to interfere with the people visiting the tower, we decided to do the fire shots there. We always think of safety first so we made sure to have all of our fire safety equipment ready, Laura spotted us, and we stayed well away from the trees. Paul is wonderful to work with because he always has fun ideas for photos. We don't like to take ourselves too seriously and always make sure to get a few photos in non-dance poses for fun. Paul had the brilliant idea this time to do some fun things with perspective on the forest path. When it was time to switch costumes, we changed with Laura's help one at a time while the other took the opportunity to take some solo shots. It is always a good idea to trade off like this if you can, in order to use the photographer’s time as wisely as possible. After we were both changed into the coin bedlah costumes, we did more duet shots in the woods before heading to the tower. It turned out a lot of people were keen on using Poet's Seat as a photoshoot location that day because when we returned to the tower there was a wedding party doing photos there! I still regret not asking them if they wanted to photobomb each other’s shoot. In the tower we decided to return to the top tier. It was getting cloudy which we were worried might make the photos look dark or wouldn't be as pretty as a clear sky, but it ended up being absolutely perfect. Paul really used the clouds to our benefit and we created some great sword shots with dark and stormy backgrounds due to the cloudy skyline. We wrapped up on the next tier down so we could get a few more shots by the arches and another professional photographer who happened to be on a day trip to Poet’s Seat came across us. She was excited and asked if she could take a few shots as well. We all agreed and we ended up getting some beautiful pictures from her and making a new photographer friend. Lots of hard work on our parts, as well as the talented Paul Jones, created the beautiful photos in this post and many more. After a long day filled with costume and prop changes, hiking up many flights of stairs in the tower, and successfully manipulating fire in our brand new costumes (yikes!), both Felicia and I came out with some amazing images and had a ton of fun working with some of our favorite people.
Stay Tuned! I hope this post has given you helpful information on what it is like behind the scenes at a photoshoot. Please feel free to ask any questions you have about this post or photoshoots in general. Upcoming posts will cover choosing a location, developing your look, and what to do the day of your shoot. As always, if this series inspires you to do your own photoshoot please share the photos!
Choosing a Photographer You may have a certain image in your head of the type of photos you want to create and need to find a photographer who fits that vision. Or you may already have a photographer in mind whose style you really love. If you already know exactly who you want to work with, that is great! If not, you will have some research to do. Here are some steps and helpful information to keep in mind when seeking out a photographer to work with: Get recommendations: To begin your research you can always go straight to google and see what photographer are in your area and what style of work they do. You can also check websites of local dancers to see who they have worked with. This can be a great option because you can ask about their experiences with different photographers. Whether you are searching for local photographers or seeking suggestions from other dancers for photographers they know who are familiar with shooting bellydancers, it is always a good idea to hear recommendations from other clients as well. You may also luck out and have a photographer on tour in your area who specializes in working with dancers. For instance, in recent years, Pixie Vision Photography (link) and Michael Baxter (link) have both been in the Boson area.
Dance photography is unique - you don't want to hire a landscape or architectural photographer for a dance shoot. Similarly, wedding photographers and corporate headshot photographers have a different skill set. Talk to dancers and performers who have shots you enjoy, and look to photographers who specialize in people - from street photographers to family photographers - people who have a knack for capturing the right moment. -Paul Jones, RT2 Photography When choosing a photographer I encourage you to do your research. Take a look at a variety of photographers' work and see if you can find a style that you like. As in any art form, photographers come in all flavors. Some photographers create mystical fantasy tableaus, but others are more used to shooting the occasional weekend wedding. Try to choose a photographer who has worked with dancers before and is used to creating photo compositions that accentuate the movements of a dancer. -Hayam, Professional Bellydancer Price point and costs: You can always first check a photographer's website to search for a listing of fees for different packages and what is included in the price. If there is no information about pricing on their website, you can inquire by emailing them and asking.
Different packages from different photographers usually include a limited number of digital images. Often, you will receive about 10 images, but you can typically order additional photos for an extra fee. In some cases, a package may include a full gallery, although that is rarer or potentially available for a surcharge. When calculating costs you should also think about the reason you want the images. If you are a hobbyist getting photos for fun and are primarily interested in new photos to share with friends on social media, you may be fine with lower resolution digital copies. However, if you are a professional dancer getting photos for promotional purposes, you will likely need to factor in the cost of purchasing high resolution images. Be very wary about trades. Twice over the years I have worked out trades with local professional photographers and I never received the images, even though I had completed my part of the agreement each time. If you are entering into a trade or barter situation with a photographer be sure to use a contract. Communicating with a Photographer: You have chosen a photographer and researched their work. You have found someone whose work you love and whose style really suits you. Now it is time to check in about booking them for your photoshoot. With a good photographer, this process should feel like a mutual collaboration. Let them know your overall vision for the photos (you can use example photos from their work or from other dancer's shoots to communicate this). Ask if there will be time for a costume change. If you are doing a studio shoot and want to use a veil or isis wings ask for the room size and ceiling height. Also ask whether tossing fabric will fit in front of the backdrop. If at any point in this process you feel uncomfortable with the chosen photographer or you don't feel like your needs are being met, you can politely bow out of the shoot and look for another photographer.
It is also important to remember that working with a photographer is a very intimate experience. If you are not comfortable with your photographer, you will not take good photos. Read customer reviews. Talk to dancers who have worked with your photographer of interest. Make sure that your photographer has a personality that you jive with artistically. If your photographer makes you feel nervous or uneasy, you will likely be paying an awful lot for a bunch of awkwardly tense photos. And a word of caution...don't contact photographers who are advertising on public forums looking for "female models" hoping for some cheap images. I assure you, that won't be comfortable! -Hayam Hold on a second -- whose photos are they? It is important to remember that photographs are considered the intellectual property of the photographer, not the model. Check with your photographer to see if there are any restrictions on their use, or if they will offer your images for sale elsewhere. Think of how many products you have seen over the years with famous dancers on them. Those dancers are not necessarily endorsing every product with their image on them. The images may have been sold to manufacturers who want to use them on their products. Talk with your photographer if you are uncomfortable with your images being sold to others, and be sure to check in beforehand to be sure you understand what their policy is about image use.
Be sure to making it clear to the photographer how much exposure you are comfortable with. While the photographer does technically own the photograph, a good one will respect how much you are prepared to share. I've found especially in the dance world, many dancers are sensitive about their image, and where their image ends up. I always try to ask if posting to Facebook (my chosen social media) is acceptable. Some photographers use Google+, Twitter or Instagram instead, and it's worth knowing. This may also be covered in a contract. -Paul Jones, RT2 Photography Credit where credit is due!
Please always give credit whenever possible when using your gorgeous new photos. In some cases, like on business cards or fliers, there may not be a spot to give a photo credit. However, on your website or social media accounts there is almost always a way to add a caption giving credit to the photographer. They worked hard to take such great photos of you, you should tell the world! Stay Tuned! I hope this post has given you helpful information on choosing and communicating with photographers for your next shoot. If so please feel free to share your photos and brag about the awesome photographer you worked with! Upcoming posts will cover choosing a location, developing your look, what to do the day of the shoot, and will give you a behind the scenes look at Felicia and I's recent shoot with RT2 Photography.
General Do’s and Don’ts 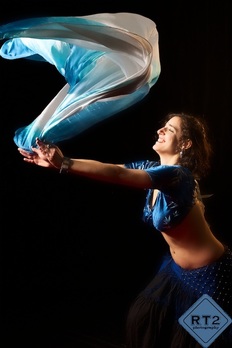 Photo of Chaya Leia by RT2 Photography. Photo of Chaya Leia by RT2 Photography. Do:
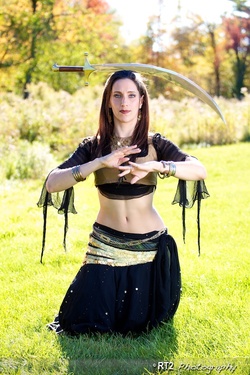 Photo of Felicia Malachite by RT2 Photography Photo of Felicia Malachite by RT2 Photography
Don't:
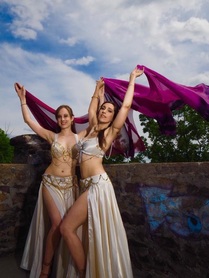 Photo of Sahina and Felicia by RT2 Photography. Photo of Sahina and Felicia by RT2 Photography. How do you know if you need photos? Professional dancers need to have current photos for marketing and promotional purposes. This generally means doing a new photo shoot every 1-3 years during your dance career. While non-professional dancers (from hobbyists to dancers interested in going pro in the future) don’t necessarily need professional photos, they can be nice to have just for fun. One of the things that attracts many of us to the world of bellydance is that we get to be glamorous and fabulous. So, if it makes you feel happy to get fancy and have beautiful photos, I say go for it! Stay Tuned!
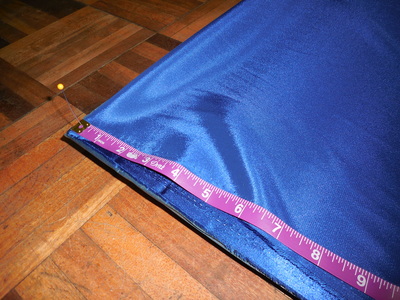
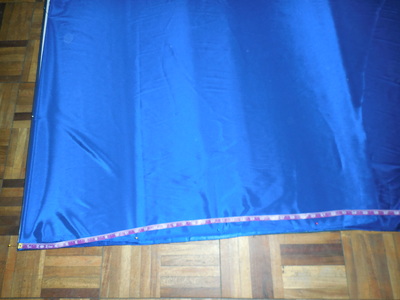
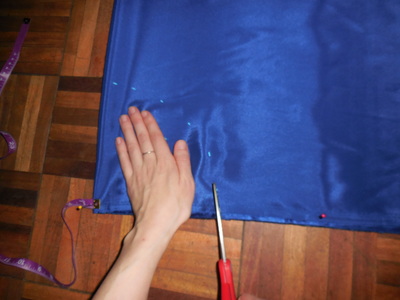
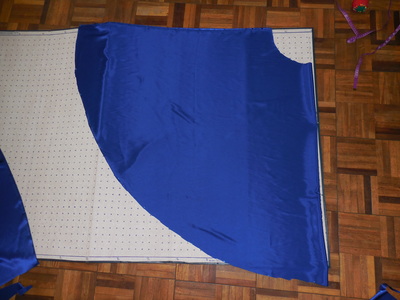
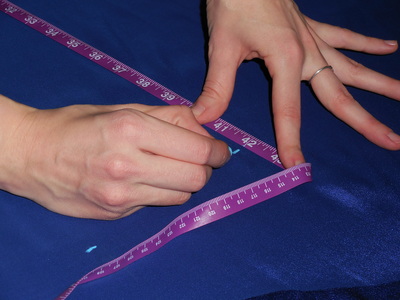
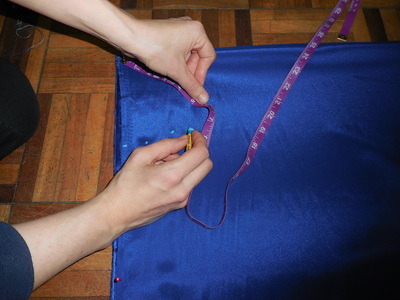
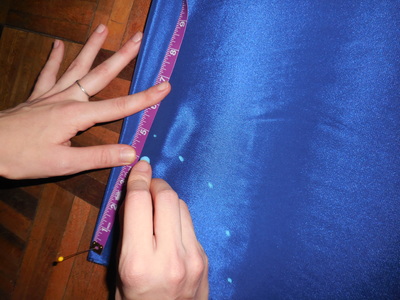
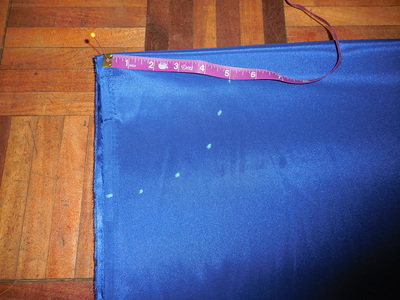
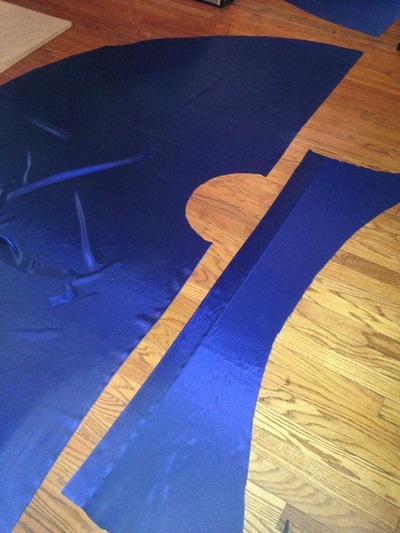
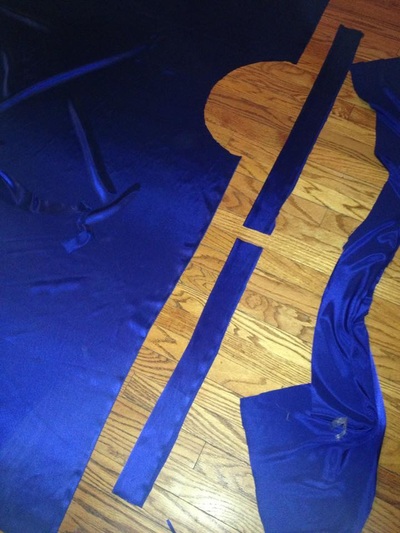
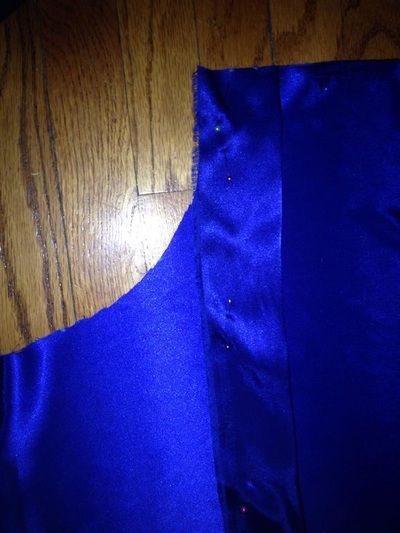
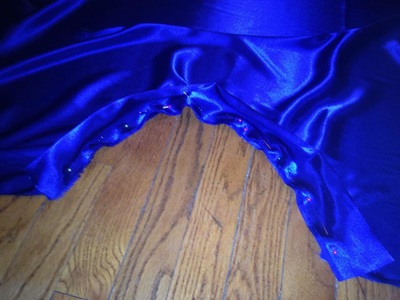
Subsequent posts in this series will discuss in greater detail working with a photographer, choosing a location, developing your look, and what to do the day of the shoot. If this series inspires you for you next photoshoot please share your beautiful photos, I would love to see them! Feel free to contact me with any questions! Circle skirts are a integral part of any bellydancer's closet. They are beautiful to move in and can be a variety of colors to add contrast and excitement to any costume. My students have worn circle skirts in different fabrics, from chiffon to satin, with a full bedlah or with a sparkly choli tops and coin belt. You can always purchase a circle skirt through a vendor like the amazing L Rose Designs (hey, look at my students rocking those L.Rose circle skirts!), but if you have the time and inclination, you can make your very own. It is a pretty simple process and once you get the hang of it, you might even enjoy it! Estimated Time: 1-2 hours 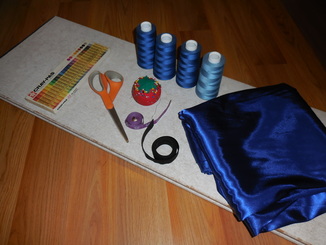 Materials: Fabric (approx. 5 yards for a standard circle, 7.5 for a circle and a half) Scissors Measuring tape Pins Elastic (3/4 inch width) Cutting board Chalk/craypas Serger/sewing machine Safety pin Needle and thread First of all, you will need to decide what kind of circle skirt you want to make. The standard is a full circle, but some dancers prefer a circle and a half, which provides more movement and swishy-ness while you dance. A standard full circle skirt is made up of two half-circle panels, which the circle and a half is made up of three. If you want an even swooshier skirt you can keep adding panels, my largest circle skirt is a Pharaonix Arabesque skirt that is a full 2.5 circles (equivalent to 5 panels). Once you decide on the type of skirt you want to make, you will need to do a quick bit of measurement and maths (Gasp! Yes, maths...). This will ensure that your skirt will be the appropriate length and hip size to fit you best. Step 1: Taking your measurements In order to figure out how long the skirt should be, measure from where you want the skirt to sit on your hips to the floor, we will call this measurement h for height. Have a friend help you so you can get an accurate measurement. Remember- if you bend to the side to look at the measuring tape, it won't be an accurate number! Next, measure around your low hip, the fullest part of your bottom. Now, you will need to do some math. First, multiply pi (~3.14) by the number of panels that you will be making (N), 2 for standard circle skirt, 3 for circle and a half. Next, divide your hip measurement (H) by this number. Be sure not to confuse measurements h and H! This will give you the radius of the waistband opening at the top of the skirt which we will call r. For those of you who are math-minded, the equation looks like this: r=H/3.14*N This waistband radius (r) plus the height (h) you measured earlier will give you the total length of the fabric to cut (L) for the hemline. L=r+h For example, if you are someone whose hip measures 36 inches around and your height to the point you want the skirt to sit is 38, your equation will look like: For a standard circle: r=36/(3.14x2)= 5.73 in. L=38+5.73=43.73 in, we will round to 44 For a circle and a half: r=36/(3.14x3)= 3.82 in. L=38+3.82=41.82 in, we will round to 42 These will be the important numbers to remember during this process and for future skirts so be sure to write them down. Now, to make the skirt! Step 2: Prepare the fabric Take your fabric and fold one side over the rest of the fabric. Note: do not fold the fabric in half. You want to be able to cut multiple panels out of the rest of it, and this will save space, and money! Lay it out on the cutting board with the folded edge lined up with the side of the board and the edges of the fabric along the bottom. Make sure that the amount of fabric available after it is folded is slightly more than the calculation for L (ideally just 0.5-1 inch more to conserve the most fabric). Pin the measuring tape to the top corner of the board, through the corner of the folded fabric as seen in the figures above. This will let the measuring tape pivot to help you trace out the circular panels. Step 3: Trace the skirt panel Move the measuring tape in an arc along the fabric, tracing out the L measurement. Use chalk or craypas to make dots along the way as you drag the tape in an arc. Repeat step 3 in a smaller arc at the top of the skirt using the r measurement. These steps are the shown in the panels above. Step 4: Cut the panel Cut along both dotted arcs. You now have one panel! Step 5: Make the additional panels Repeat this process (steps 2-4) again for as many panels as you need. Make sure to conserve fabric by folding the fabric and turning it so the next arc will use the excess from the previous arc. Step 7: Prep the waistband To attach the waistband fold it in half with the pretty side facing out and then lay it on top of the pretty side of the panel. The sides of the fabric you want facing out at the end should be facing each other for the sewing process. It will look upside down at this point, with the folded edge facing the bottom of the skirt panel and the 3 unsewn seams (the two sides of the folded waistband and the top of the skirt) all on top of each other at the waistband opening. Pin along the arc as best you can, it is always tricky to pin curved things. The goal is that the edges of the strip of fabric will align with the edges of the panel after it is all pinned. These steps are shown in the images below. Step 8: Attach waistband to front of skirt Serge along the pinned line so that the strip forms a waistband on top of the panel. Take your time with this, it is tricky to keep the edges aligned and to sew around the curve. Plus on a serger you can not sew over pins so you will need to take them out as you sew along. Once you have finished sewing and folded the waistband up it will look correct. There should be no parts where the fabric is pulling apart. If there are any gaps where the fabric slipped and wasn't sewn just go back over that section. Step 9: Attach waistband to back of skirt Repeat steps 9 and 10 for the back of the skirt. If you made a 3 panel skirt the back two panels should be sewn together (right sides together and serge along the edge) before you attach the waistband. Step 6: Make a waistband Lay one panel out unfolded and measure along the top (hip) arc as best you can with the measuring tape. You could calculate how long this will be but I find that the cutting process always ends up slightly different from the idealized measurement you would get from another equation so I am going to recommend measuring for this step. If you are making a 2 panel skirt do this for each piece. If you are making a 3 panel skirt you will need to do this for the panel that will be the front, but then you will serge together the other two panels for the back and measure the full waistband of the combined panels (it will be about twice as long as what you measured for the front panel). Lay out some of the scrap fabric from making the panels to find a piece large enough for the waistband. You want the waistband to be a rectangle with the long side the length of the top hip arc you just measured and the short side about 3-4 inches as shown in the figure below right. Note- For a 3 panel skirt in order to make the large back panel you will lay 2 of the half circle panels on top of each other with their right sides together (the sides you want showing at the end). Then use a 4 thread overlock stitch on your serger to sew along one of the straight sides (from the hem to the waist arc). Be sure to do a test run with scrap fabric before sewing your skirt panels to test the tension settings and make sure the panels won't pull apart after being sewn together. Step 10: Add elastic
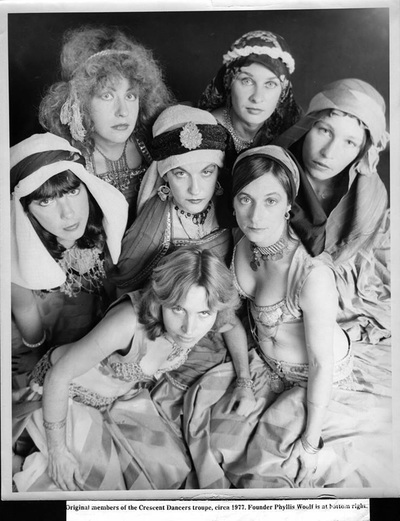
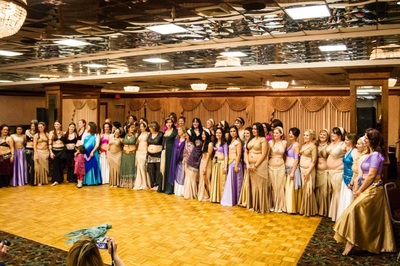
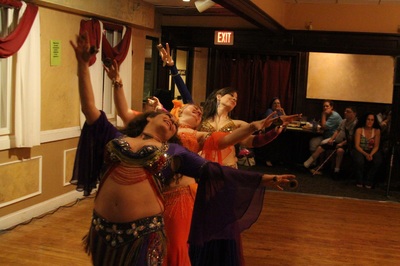
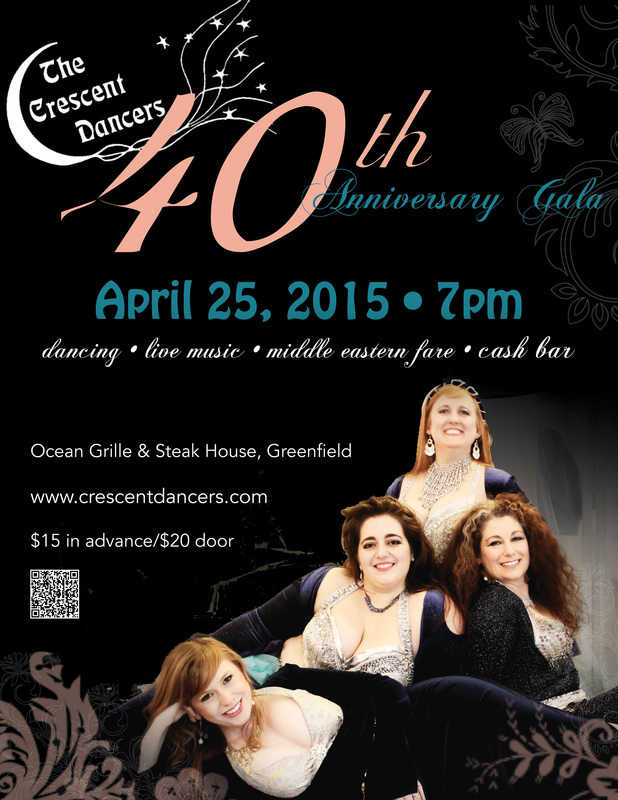
Hold a piece of 3/4 inch elastic around your waist where you want the skirt to sit. Make it as tight as you would want to wear your skirt. Allow for an overlap of about 1/2 inch with the elastic and then cut it. Using a safety pin attached to one end of the elastic, thread it through the waistbands of each of your panels. I find this step is infinitely easier if I attach a piece of chain to the elastic with a safety pin and drop the chain through the waistband to pull the elastic through. Once it is through overlap it as much as needed and sew the elastic ends together. Step 11: Mark hem line While wearing it and standing straight, have a friend mark along the bottom of the skirt where it hits the floor. Step 12: Finishing touches Stitch a rolled hem along the bottom of the skirt where you just marked it to finish it and make it the length you need. Then fray check any serging tails from the waistband attachment and on the ends of the panels where you just sewed the hem. Now put on your sparkly belt and top and shimmy away! Tips and Tricks! 1.) Since the panels will be able to slide along the elastic, you can choose how they fit together. This allows you to choose if you want gaps between the panels or if you want them to touch closely to show no gap. 2.) Layering circle skirts is a great way to get more color and texture in a costume. Having the panels able to slide along the waistband allows you to have greater options for layering since you can also use the gaps to showcase a second skirt underneath. You can use different fabrics (like chiffon over or under satin), or the same fabric in different colors to make your costume more dynamic! Lately, I have been reflecting on how lucky I am to have such a strong 'belly-lineage'. Western Massachusetts may be quite geographically small, but we have big dance roots. I moved to the area in 2006 and was overwhelmed by the amazing community I found. I had started taking bellydance classes a year before in a small Connecticut town, but there were very few teachers and events. Prior to moving to Massachusetts, I heard about a workshop in Hartford with Rose Champagne. She was one of the teachers I had been researching in anticipation of my move and I couldn't wait to try her class. I signed up right away and eagerly counted down the days until the workshop. On the day of the workshop I was blown away by her poise and presence; the way she moved was so beautiful, such grace and intention in everything she did. I couldn't wait to relocate and start taking her classes. In September of 2006 I began as a student in her advanced beginners class followed by my first performance at Jewel of the Valley a few months later. It was a remarkable experience. Meeting the students in her other classes introduced me to many of the other terrific dancers in western MA: the lovely ladies of Sahibat, Sanaa Amel, and many more. I continued taking classes with Rose until her illness forced her to quit teaching. It honestly brings me to tears as I write this to recall the deep loss felt by our community when she passed away in 2008; a loss we still feel in her absence today. She is so greatly missed, and the best way to remember her is to take a look at all of the wonderful dancers who she trained and inspired. I am so lucky to count myself among them. When Rose stopped teaching I took classes with several other teachers before ultimately settling in with Shifah. Shifah was Rose's teacher, and I thought to myself “who better to continue my training with then the woman who trained Rose?” Shifah's classes were marvelous, I learned so much about Vintage Oriental, and many other dance styles. She has been dancing since the 1980's and was a member of the Crescent Dancers, western MA's premier troupe that had been going strong since the 1970s. I was also spending a lot of time on the Bhuz forums in these years and I realized something. So many members were talking about newer dancers losing the knowledge of more traditional forms, and it made me realize how very lucky I was to be studying with amazing people who were carrying on the history of Vintage Oriental dance. We were using zills, dancing to 9/8s, dancing out of veil wraps, it was wonderful. In 2010, Shifah decided to semi-retire (she always used to talk about retiring, but we all know she can't truly stay away from dance- and we wouldn't want her to!). She asked me to take over her classes for her, and that is how my life as a professional dancer began. I look back now, 5 years later, and I am still amazed at how everything has progressed. I have taught so many wonderful students, some of whom are now moving towards, or transitioning into becoming professional dancers themselves. The Crescent Dancers 40th anniversary show is this weekend and it has really made me think about the dance community and belly-lineage. Retired Crescent Dancers will be joining in, Shifah will be doing a guest appearance, and three of my students (though one was a classmate of mine in Shifah's classes long before I started teaching!) are now members of the Crescent Dancers. I just could not be more proud to be a part of such a beautiful dance history.
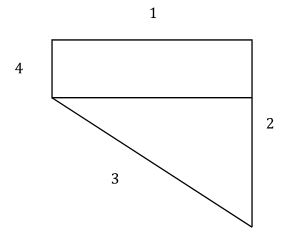
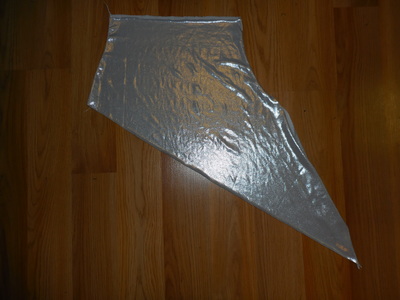
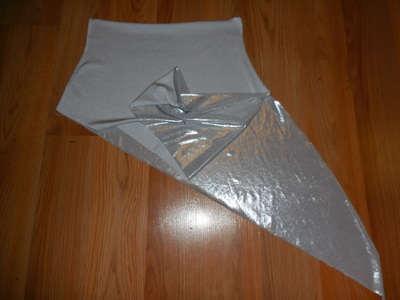
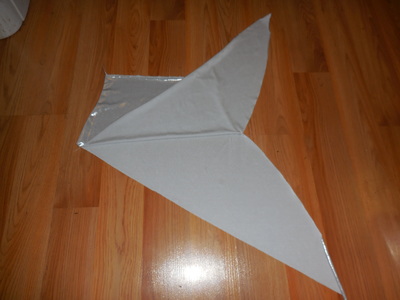
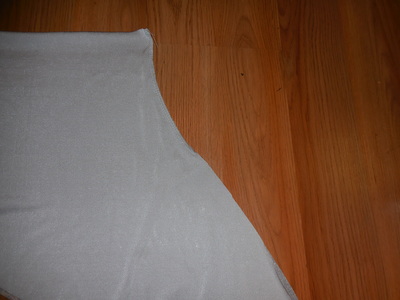
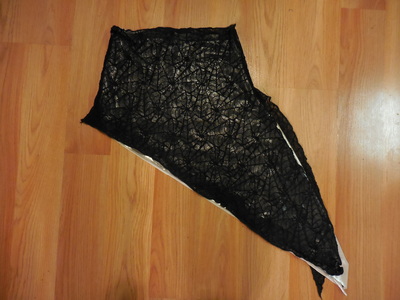
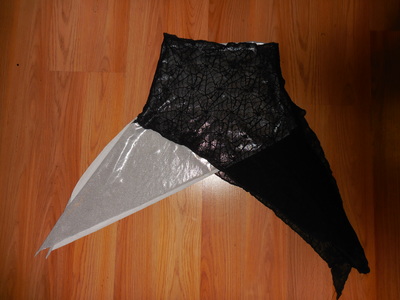
To my friends in the current incarnation of the Crescent Dancers -- Hadama, Aralia, Melissa, and Debira, and to all of the retired members who will be dancing, I cannot wait to see your show (and to emcee it)! And to all of you who want to witness a piece of the amazing bellydance history and lineage from our Western Massachusetts area, I wholeheartedly encourage you to buy your tickets now for the gala on April 25th! It’s going to be a wonderful night and I am so excited to see what is in store! Hip scarves are a great way to add some fun to your practice wear, or as part of your performance costume to add texture or layers of color. You can find different types of hip scarves at various online stores, or even shopping for lace and knitted shawls on Ebay. But, if you want to save some money and customize your own, this is a super easy and quick tutorial that will give you a new hip scarf in 20 minutes! Step 1: Make a quick pattern. The hip scarf is basically 2 identical pieces, with each piece made up of a rectangle with a triangle on the bottom. The sizing of each piece will depend on your hip measurement, how stretchy the fabric is, and how long you want it to hang. Measure around your low hip -- the fullest part of your hip, usually around your bottom-- then subtract a few inches to account for the stretch of the fabric. (This will depend on how stretchy your fabric is—don't be too be conservative! It is much easier to take off more inches if you find it is too big than to add more fabric after cutting it off!) On tracing paper, draw a rectangle with the width measurement you decide for your hips (low hip minus x number of inches), and height enough to cover your bottom. Measure from where you want the top of the hip scarf to sit on your hips (called your upper hip measurement) to how far you want it to cover. Remember—you are naturally curvy, so if you want to make the top of the scarf to cover your whole bottom, make sure to measure over the fullest part of your backside. Then draw a line at a slight diagonal coming out from the bottom corner of one side of the rectangle. Then draw a line from the bottom of that line to the other bottom corner of the rectangle. Your pattern should look something like the image below. Alternatively you can have the bottom part of the rectangle flare out slightly and the point of the triangle extend slightly out to the side at a diagonal depending on how wide your hips are. 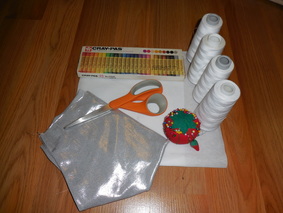 Materials: Fabric- either 2 or 4 way stretch Serger Matching thread Tracing paper Fabric scissors (or really sharp ones) Sewing pins Chalk or craypas Step 2: Prepare your fabric! Trace around the pattern using chalk or a craypas, then flip the pattern over and trace a second piece. Cut out the two pieces of fabric. You could also fold the fabric before tracing and cutting, so that you would cut through both pieces of fabric to create two sides of the pattern. The image on the left below shows what the cut fabric will look like if you slightly flare the bottom edge of the rectangular part that goes over the hips. Step 3: Finish the edges. Serge sides 1-3 with a rolled hem on each piece separately. Step 4: Sew sides together Lay the two pieces on top of each other, with the right sides of the fabric facing each other on the inside as shown in the right hand image above. Some fabric won’t have a clear outside and inside, but others will be important to have the part you want seen when you wear it to be on the inside. Pin sides 2 and 4 together. Serge the scarf together using a 3 or 4 threat overlock stitch, as shown in the right hand image below. Sew sides 4 together. Sew sides 2 together only to where the rectangle part ends and the triangle begins so that it is held together over your hips by the same amount as side 2, and the triangle part is open and flowy. The triangle part has been flipped up in the left hand image below to show approximately how far down side 2 is sewn. Step 5: Try it on, and make adjustments. Turn the fabric inside out, so the right side is now on the outside. Step into the hip scarf and see if it needs to be made smaller. If so, turn the fabric inside out again and serge along side 2 and/or 4 to make the width smaller. Step 6: Final touches! Fray check the edges, and get ready to dance! Styling options:
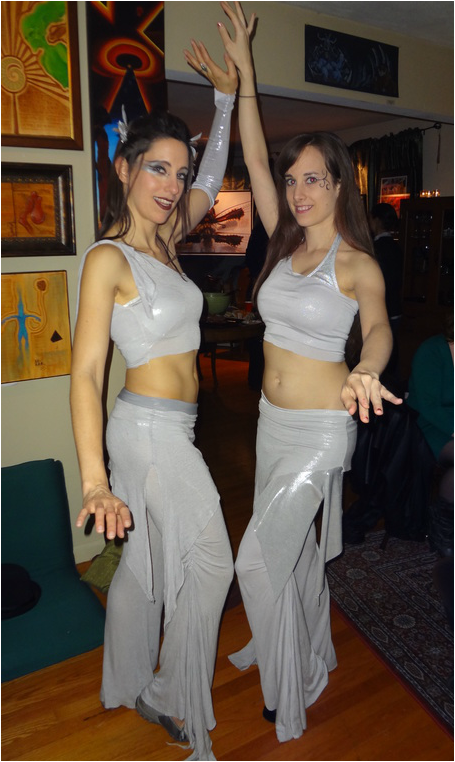
1.) Make one in a bright or sparkly fabric and one in a lace or net to wear over it as in the left hand image above. 2.) Make 2 in complimentary colors and wear them with the triangles on opposites sides of your hips to give color contrast as in the right hand image above. 3.) The same pattern can be used as a top if you consider the waistband part to the the underbust portion and tie the two triangle ends over one shoulder. Felicia and I are wearing layered silver and grey triangle hip wraps with grey tops over silver halters below. So many wonderful things happened in 2014! I got to watch my students grow as dancers, dance with many beautiful and wonderful ladies, learn new skills, buy a beautiful new costume, and take workshops and attend intensives with some of my favorite people. Here are some of the highlights. Teaching and Student Achievements * Taught classes on Vintage Oriental routines, Egyptian Saidi, Sword Dance, Modern Egyptian, and more * Co-taught a workshop on Dancing with Live Drummers with Amanda Turk at the Raq On Shimmyathon * Coached Penny and Naomi on their first solo pieces and Nancy and Jamie on their first duet * Hosted Navel Academy workshops * Avienn presented her first group choreography at the Goddess Lounge * Emily joined the Crescent Dancers * Melissa and Lisa had their classes present pieces at the Dancing into the Dark and Dancing into the Light showcases Performance * Participated in super fun Vaudeville and Halloween themed shows at the Goddess Lounge * Continued working with Kenna and all of the wonderful ladies of the Goddess Lounge * Danced at a variety of private events including birthdays, weddings, Vashti banquets, NYE celebrations * Co-hosted spectacular Dancing into the Dark and Dancing into the Light student showcases with Chaya Leia * Performed my first fire dance show as a member of the Illuminata Dance Company at Cultural Chaos
Studying * Returned to Ansuya's wonderful classes when visiting Florida * Attended the Viva La Difference intensive with Artemis Mourat and Yasmin Henkesh * Attended the Art of the Belly conference and had the chance to study with Mira Betz, Artemis Mourat, Belladonna, and Amina on 9/8 drum solos, scimitar dance, zills, layering and more * Attended the Raq On Shimmyathon * Took a variety of classes and workshops with Aszmara, Basimah, Fahra, Chaya Leia and more * Took part in the Raq On Versatility Challenge * Cross trained in waltz and swing * Attended the Southern Vermont Dance Festival and took workshops in Charelston, Ballet, Waltz, Swing, Flamenco, and Broadway Jazz Other
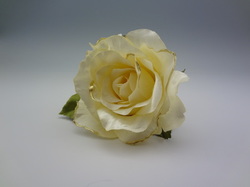
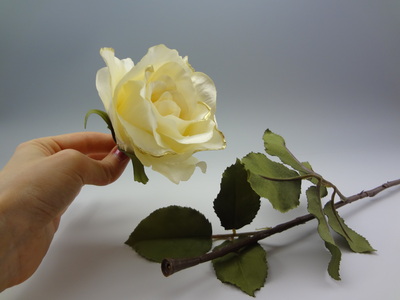
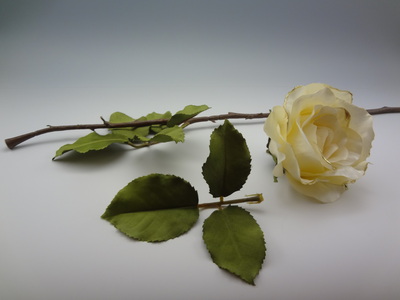
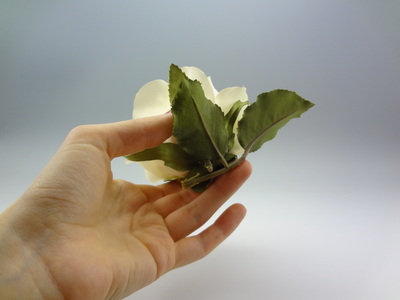
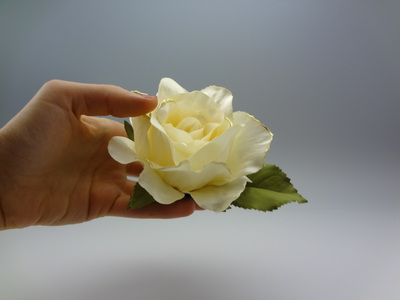
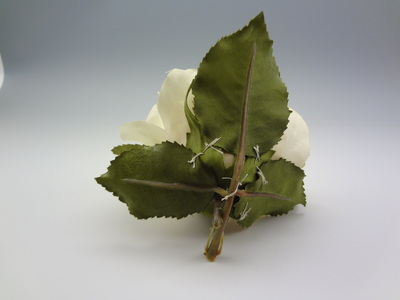
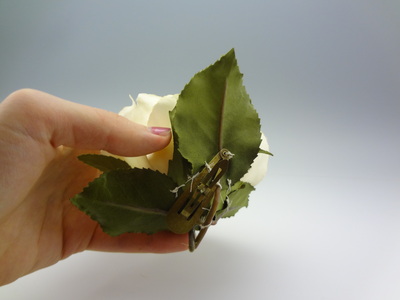
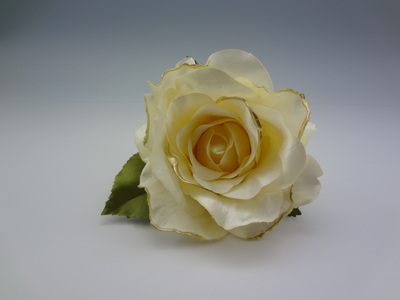
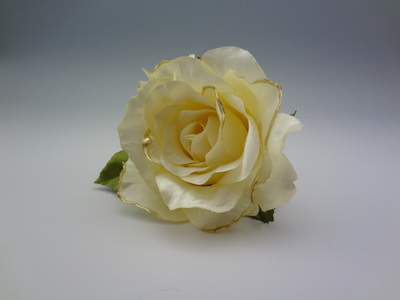
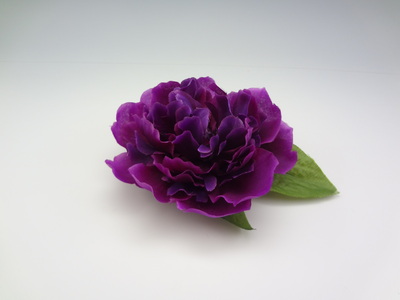
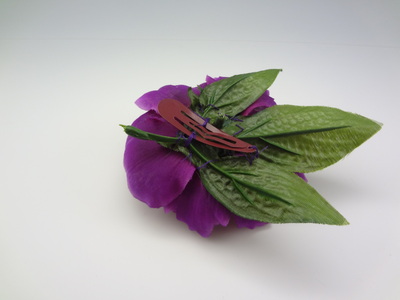
* Hosted the fourth annual Secret Habibi gift exchange * Attended the Arabic Music Retreat concert * Purchased my first brand new (not used or self made) costume from Raya Tretyakova * Made a fun new Vaudeville costume out of lace and glass pearls and some cute little hats I'm looking forward to more fun dance adventures in 2015! 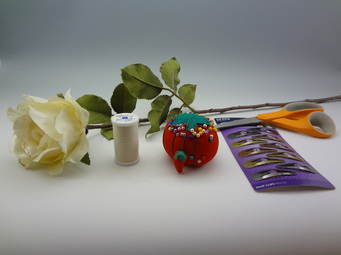 I love wearing flowers in my hair, they are the perfect easy fix when there isn't much time to style it and are great for dance shows or a night out. Plus they are quick and easy to make too! Materials: Flower Needle Thread Scissors Hair Clip Optional: jewels for the center of the flower Step 1: Remove the stem from the flower. Often there is a center piece in the middle of the flower that needs to be removed to pop the stem off. Once this is removed the petals may not stay together so you will need to sew them together by going through the center of the flower where the stem was attached. Some flowers do not have this and can just be popped off the stem and the flower stays intact once removed, the white rose I am using here is that type. Step 2: Decide on the way you want the flower to lay when worn by holding it up to your head. This will allow you to determine which way the clip should face so that the side of the flower you want visible is forward. The clip will go on with the open side facing the back of your head when it is upclipped. Step 2b (Optional): Sometimes I like my clips to have a few leaves on the flower as well. If you would like to have leaves detach one set of leaves from the discarded stem and determine how you want them oriented while determining which way the flower and clip will be oriented. Step 3: Attach the clip by sewing over the two flat sides and through the hole at the end. If you are attaching leaves sew those on before the clip and then sew the clip on top of the leaves. Step 3b (Optional): Sew a small brooch, crystal, or other pretty finding into the center of the flower. Some flower shapes work better for this then others. Roses generally don't work well for this unless it is a very small bead such as a single pearl. Other flowers such as daisies work well with a larger finding or brooch in the center. Step 4: Wear your pretty hair flower for you next dance or night out!
|
SahinaMy adventures in dance, music, costume design... Categories
All
Archives
January 2020
|
|
Sahina Bellydance | sahina@sahinabellydance.com
Amherst MA 01002 | Easthampton 01027 | Northampton 01060. All Content Copyright Sahina Bellydance 2010-2024. All Rights Reserved. |


 RSS Feed
