|
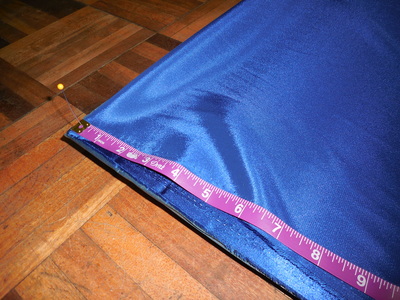
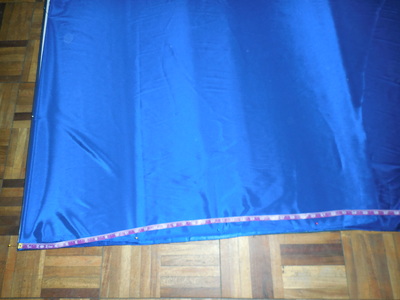
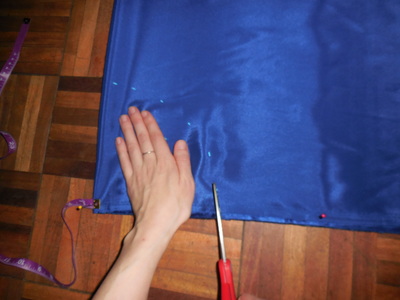
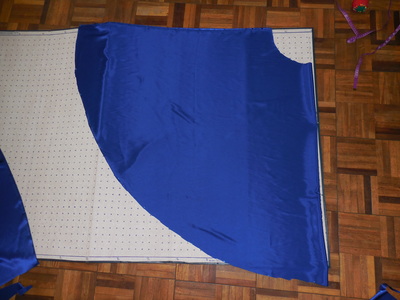
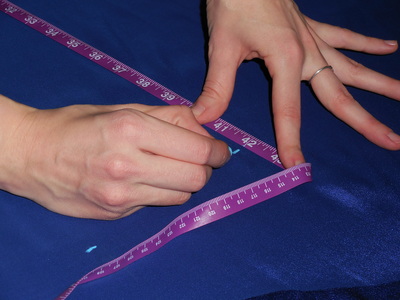
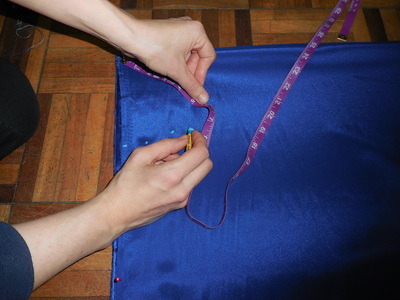
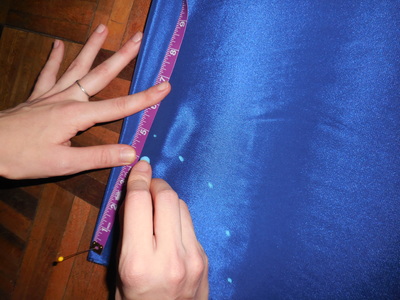
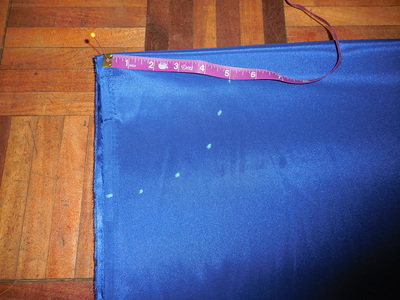
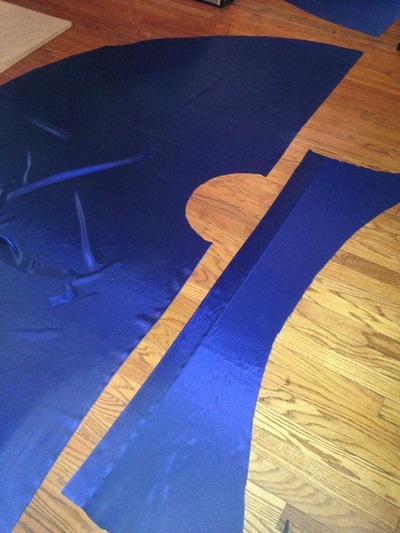
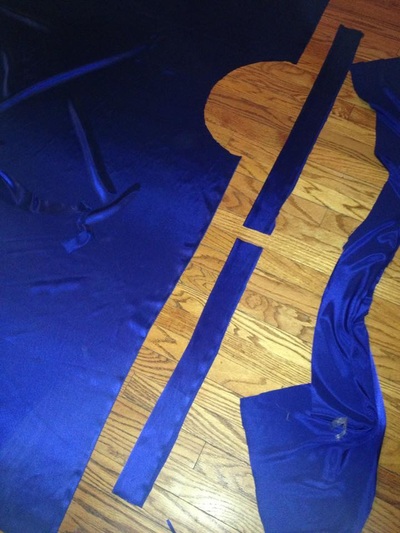
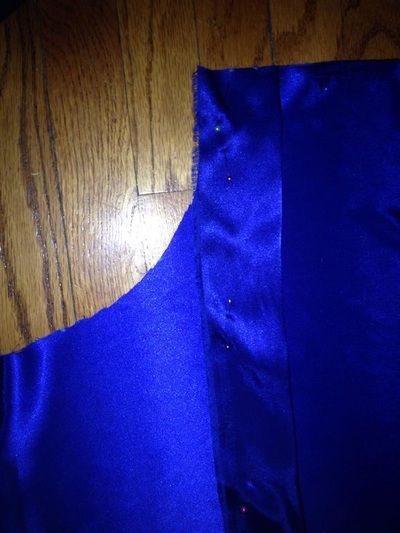
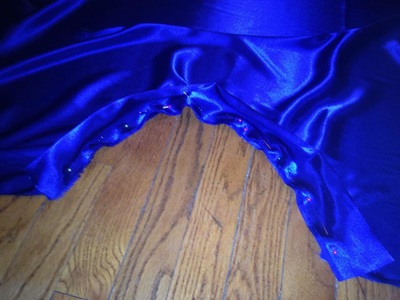
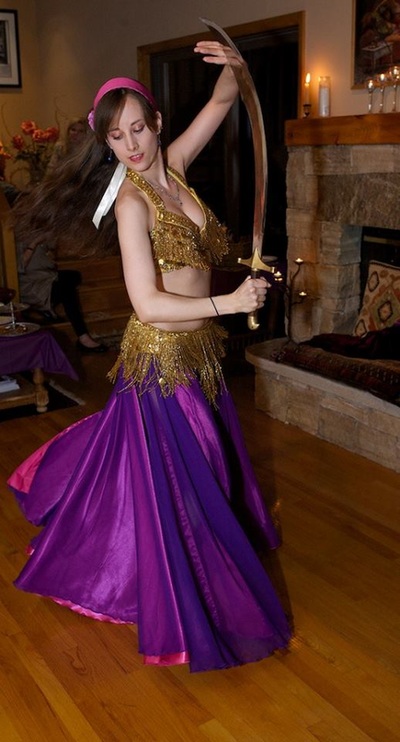
Circle skirts are a integral part of any bellydancer's closet. They are beautiful to move in and can be a variety of colors to add contrast and excitement to any costume. My students have worn circle skirts in different fabrics, from chiffon to satin, with a full bedlah or with a sparkly choli tops and coin belt. You can always purchase a circle skirt through a vendor like the amazing L Rose Designs (hey, look at my students rocking those L.Rose circle skirts!), but if you have the time and inclination, you can make your very own. It is a pretty simple process and once you get the hang of it, you might even enjoy it! Estimated Time: 1-2 hours 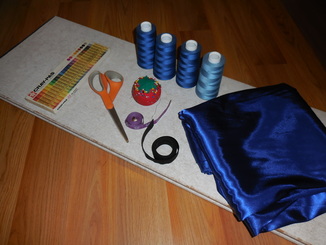 Materials: Fabric (approx. 5 yards for a standard circle, 7.5 for a circle and a half) Scissors Measuring tape Pins Elastic (3/4 inch width) Cutting board Chalk/craypas Serger/sewing machine Safety pin Needle and thread First of all, you will need to decide what kind of circle skirt you want to make. The standard is a full circle, but some dancers prefer a circle and a half, which provides more movement and swishy-ness while you dance. A standard full circle skirt is made up of two half-circle panels, which the circle and a half is made up of three. If you want an even swooshier skirt you can keep adding panels, my largest circle skirt is a Pharaonix Arabesque skirt that is a full 2.5 circles (equivalent to 5 panels). Once you decide on the type of skirt you want to make, you will need to do a quick bit of measurement and maths (Gasp! Yes, maths...). This will ensure that your skirt will be the appropriate length and hip size to fit you best. Step 1: Taking your measurements In order to figure out how long the skirt should be, measure from where you want the skirt to sit on your hips to the floor, we will call this measurement h for height. Have a friend help you so you can get an accurate measurement. Remember- if you bend to the side to look at the measuring tape, it won't be an accurate number! Next, measure around your low hip, the fullest part of your bottom. Now, you will need to do some math. First, multiply pi (~3.14) by the number of panels that you will be making (N), 2 for standard circle skirt, 3 for circle and a half. Next, divide your hip measurement (H) by this number. Be sure not to confuse measurements h and H! This will give you the radius of the waistband opening at the top of the skirt which we will call r. For those of you who are math-minded, the equation looks like this: r=H/3.14*N This waistband radius (r) plus the height (h) you measured earlier will give you the total length of the fabric to cut (L) for the hemline. L=r+h For example, if you are someone whose hip measures 36 inches around and your height to the point you want the skirt to sit is 38, your equation will look like: For a standard circle: r=36/(3.14x2)= 5.73 in. L=38+5.73=43.73 in, we will round to 44 For a circle and a half: r=36/(3.14x3)= 3.82 in. L=38+3.82=41.82 in, we will round to 42 These will be the important numbers to remember during this process and for future skirts so be sure to write them down. Now, to make the skirt! Step 2: Prepare the fabric Take your fabric and fold one side over the rest of the fabric. Note: do not fold the fabric in half. You want to be able to cut multiple panels out of the rest of it, and this will save space, and money! Lay it out on the cutting board with the folded edge lined up with the side of the board and the edges of the fabric along the bottom. Make sure that the amount of fabric available after it is folded is slightly more than the calculation for L (ideally just 0.5-1 inch more to conserve the most fabric). Pin the measuring tape to the top corner of the board, through the corner of the folded fabric as seen in the figures above. This will let the measuring tape pivot to help you trace out the circular panels. Step 3: Trace the skirt panel Move the measuring tape in an arc along the fabric, tracing out the L measurement. Use chalk or craypas to make dots along the way as you drag the tape in an arc. Repeat step 3 in a smaller arc at the top of the skirt using the r measurement. These steps are the shown in the panels above. Step 4: Cut the panel Cut along both dotted arcs. You now have one panel! Step 5: Make the additional panels Repeat this process (steps 2-4) again for as many panels as you need. Make sure to conserve fabric by folding the fabric and turning it so the next arc will use the excess from the previous arc. Step 7: Prep the waistband To attach the waistband fold it in half with the pretty side facing out and then lay it on top of the pretty side of the panel. The sides of the fabric you want facing out at the end should be facing each other for the sewing process. It will look upside down at this point, with the folded edge facing the bottom of the skirt panel and the 3 unsewn seams (the two sides of the folded waistband and the top of the skirt) all on top of each other at the waistband opening. Pin along the arc as best you can, it is always tricky to pin curved things. The goal is that the edges of the strip of fabric will align with the edges of the panel after it is all pinned. These steps are shown in the images below. Step 8: Attach waistband to front of skirt Serge along the pinned line so that the strip forms a waistband on top of the panel. Take your time with this, it is tricky to keep the edges aligned and to sew around the curve. Plus on a serger you can not sew over pins so you will need to take them out as you sew along. Once you have finished sewing and folded the waistband up it will look correct. There should be no parts where the fabric is pulling apart. If there are any gaps where the fabric slipped and wasn't sewn just go back over that section. Step 9: Attach waistband to back of skirt Repeat steps 9 and 10 for the back of the skirt. If you made a 3 panel skirt the back two panels should be sewn together (right sides together and serge along the edge) before you attach the waistband. Step 6: Make a waistband Lay one panel out unfolded and measure along the top (hip) arc as best you can with the measuring tape. You could calculate how long this will be but I find that the cutting process always ends up slightly different from the idealized measurement you would get from another equation so I am going to recommend measuring for this step. If you are making a 2 panel skirt do this for each piece. If you are making a 3 panel skirt you will need to do this for the panel that will be the front, but then you will serge together the other two panels for the back and measure the full waistband of the combined panels (it will be about twice as long as what you measured for the front panel). Lay out some of the scrap fabric from making the panels to find a piece large enough for the waistband. You want the waistband to be a rectangle with the long side the length of the top hip arc you just measured and the short side about 3-4 inches as shown in the figure below right. Note- For a 3 panel skirt in order to make the large back panel you will lay 2 of the half circle panels on top of each other with their right sides together (the sides you want showing at the end). Then use a 4 thread overlock stitch on your serger to sew along one of the straight sides (from the hem to the waist arc). Be sure to do a test run with scrap fabric before sewing your skirt panels to test the tension settings and make sure the panels won't pull apart after being sewn together. Step 10: Add elastic
Hold a piece of 3/4 inch elastic around your waist where you want the skirt to sit. Make it as tight as you would want to wear your skirt. Allow for an overlap of about 1/2 inch with the elastic and then cut it. Using a safety pin attached to one end of the elastic, thread it through the waistbands of each of your panels. I find this step is infinitely easier if I attach a piece of chain to the elastic with a safety pin and drop the chain through the waistband to pull the elastic through. Once it is through overlap it as much as needed and sew the elastic ends together. Step 11: Mark hem line While wearing it and standing straight, have a friend mark along the bottom of the skirt where it hits the floor. Step 12: Finishing touches Stitch a rolled hem along the bottom of the skirt where you just marked it to finish it and make it the length you need. Then fray check any serging tails from the waistband attachment and on the ends of the panels where you just sewed the hem. Now put on your sparkly belt and top and shimmy away! Tips and Tricks! 1.) Since the panels will be able to slide along the elastic, you can choose how they fit together. This allows you to choose if you want gaps between the panels or if you want them to touch closely to show no gap. 2.) Layering circle skirts is a great way to get more color and texture in a costume. Having the panels able to slide along the waistband allows you to have greater options for layering since you can also use the gaps to showcase a second skirt underneath. You can use different fabrics (like chiffon over or under satin), or the same fabric in different colors to make your costume more dynamic!
1 Comment
MarieKaren
3/2/2016 10:45:16 pm
Thank you very much for this informative tutorial! I love the suggestion of leaving leaving gaps between the panels for layering options.
Reply
Your comment will be posted after it is approved.
Leave a Reply. |
SahinaMy adventures in dance, music, costume design... Categories
All
Archives
January 2020
|
|
Sahina Bellydance | [email protected]
Amherst MA 01002 | Easthampton 01027 | Northampton 01060. All Content Copyright Sahina Bellydance 2010-2024. All Rights Reserved. |



 RSS Feed
