|
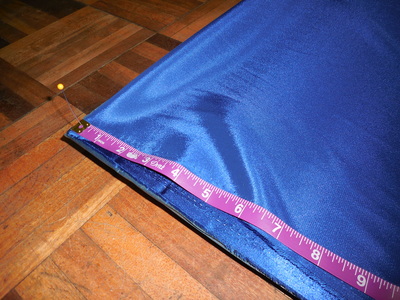
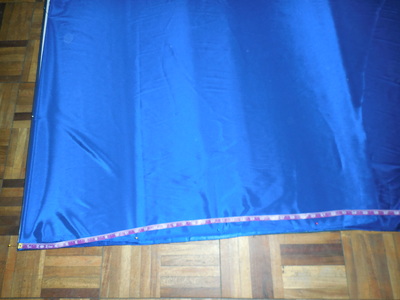
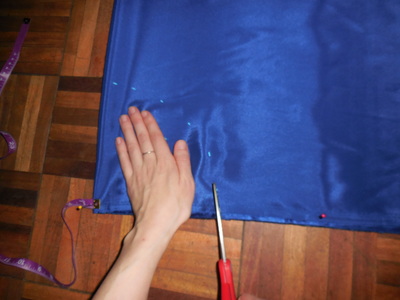
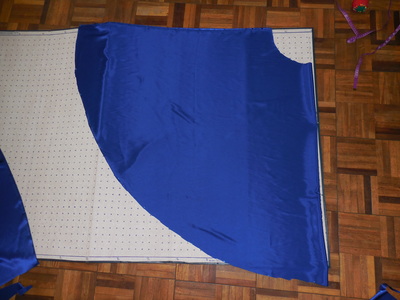
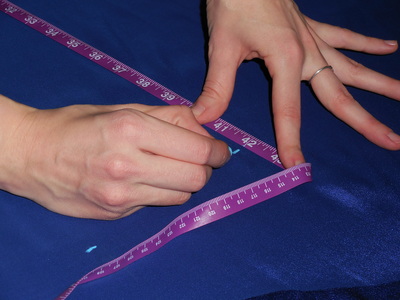
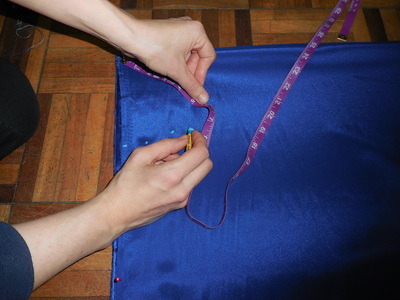
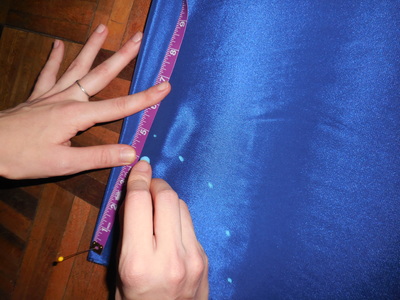
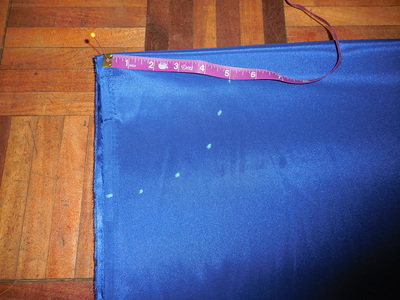
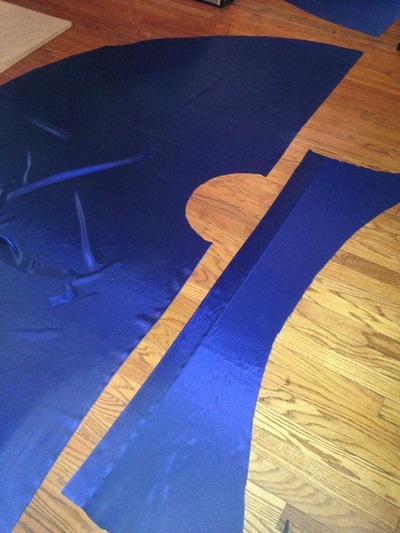
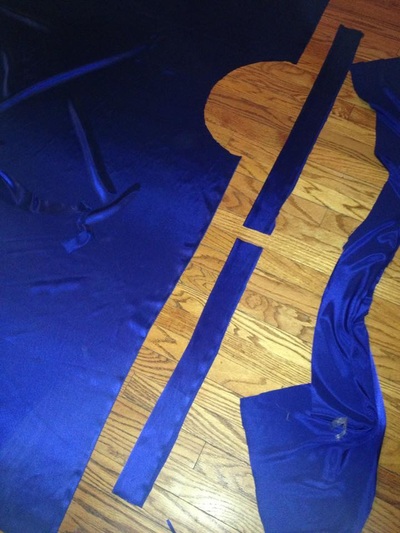
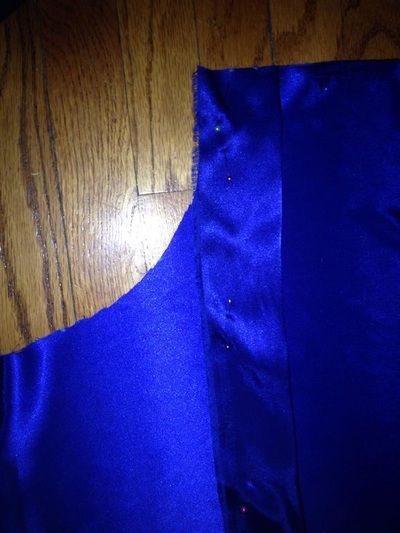
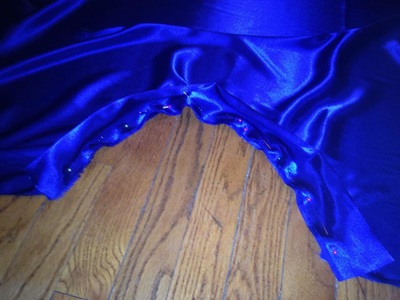
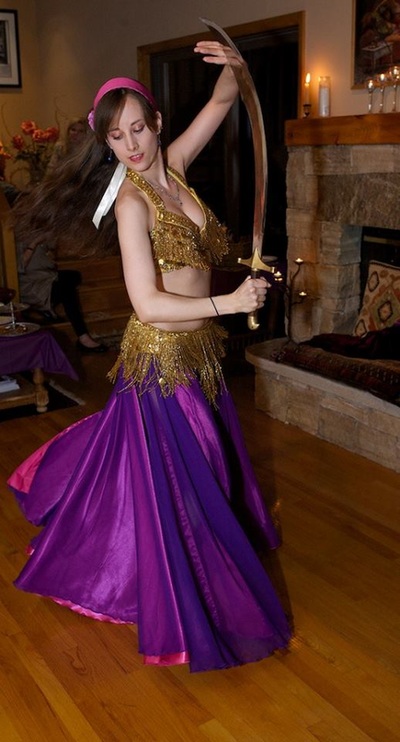
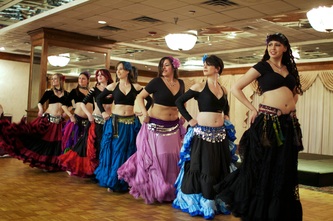
Circle skirts are a integral part of any bellydancer's closet. They are beautiful to move in and can be a variety of colors to add contrast and excitement to any costume. My students have worn circle skirts in different fabrics, from chiffon to satin, with a full bedlah or with a sparkly choli tops and coin belt. You can always purchase a circle skirt through a vendor like the amazing L Rose Designs (hey, look at my students rocking those L.Rose circle skirts!), but if you have the time and inclination, you can make your very own. It is a pretty simple process and once you get the hang of it, you might even enjoy it! Estimated Time: 1-2 hours 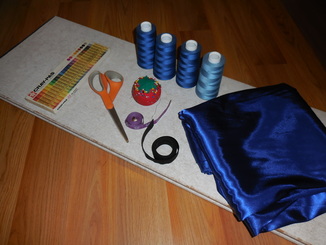 Materials: Fabric (approx. 5 yards for a standard circle, 7.5 for a circle and a half) Scissors Measuring tape Pins Elastic (3/4 inch width) Cutting board Chalk/craypas Serger/sewing machine Safety pin Needle and thread First of all, you will need to decide what kind of circle skirt you want to make. The standard is a full circle, but some dancers prefer a circle and a half, which provides more movement and swishy-ness while you dance. A standard full circle skirt is made up of two half-circle panels, which the circle and a half is made up of three. If you want an even swooshier skirt you can keep adding panels, my largest circle skirt is a Pharaonix Arabesque skirt that is a full 2.5 circles (equivalent to 5 panels). Once you decide on the type of skirt you want to make, you will need to do a quick bit of measurement and maths (Gasp! Yes, maths...). This will ensure that your skirt will be the appropriate length and hip size to fit you best. Step 1: Taking your measurements In order to figure out how long the skirt should be, measure from where you want the skirt to sit on your hips to the floor, we will call this measurement h for height. Have a friend help you so you can get an accurate measurement. Remember- if you bend to the side to look at the measuring tape, it won't be an accurate number! Next, measure around your low hip, the fullest part of your bottom. Now, you will need to do some math. First, multiply pi (~3.14) by the number of panels that you will be making (N), 2 for standard circle skirt, 3 for circle and a half. Next, divide your hip measurement (H) by this number. Be sure not to confuse measurements h and H! This will give you the radius of the waistband opening at the top of the skirt which we will call r. For those of you who are math-minded, the equation looks like this: r=H/3.14*N This waistband radius (r) plus the height (h) you measured earlier will give you the total length of the fabric to cut (L) for the hemline. L=r+h For example, if you are someone whose hip measures 36 inches around and your height to the point you want the skirt to sit is 38, your equation will look like: For a standard circle: r=36/(3.14x2)= 5.73 in. L=38+5.73=43.73 in, we will round to 44 For a circle and a half: r=36/(3.14x3)= 3.82 in. L=38+3.82=41.82 in, we will round to 42 These will be the important numbers to remember during this process and for future skirts so be sure to write them down. Now, to make the skirt! Step 2: Prepare the fabric Take your fabric and fold one side over the rest of the fabric. Note: do not fold the fabric in half. You want to be able to cut multiple panels out of the rest of it, and this will save space, and money! Lay it out on the cutting board with the folded edge lined up with the side of the board and the edges of the fabric along the bottom. Make sure that the amount of fabric available after it is folded is slightly more than the calculation for L (ideally just 0.5-1 inch more to conserve the most fabric). Pin the measuring tape to the top corner of the board, through the corner of the folded fabric as seen in the figures above. This will let the measuring tape pivot to help you trace out the circular panels. Step 3: Trace the skirt panel Move the measuring tape in an arc along the fabric, tracing out the L measurement. Use chalk or craypas to make dots along the way as you drag the tape in an arc. Repeat step 3 in a smaller arc at the top of the skirt using the r measurement. These steps are the shown in the panels above. Step 4: Cut the panel Cut along both dotted arcs. You now have one panel! Step 5: Make the additional panels Repeat this process (steps 2-4) again for as many panels as you need. Make sure to conserve fabric by folding the fabric and turning it so the next arc will use the excess from the previous arc. Step 7: Prep the waistband To attach the waistband fold it in half with the pretty side facing out and then lay it on top of the pretty side of the panel. The sides of the fabric you want facing out at the end should be facing each other for the sewing process. It will look upside down at this point, with the folded edge facing the bottom of the skirt panel and the 3 unsewn seams (the two sides of the folded waistband and the top of the skirt) all on top of each other at the waistband opening. Pin along the arc as best you can, it is always tricky to pin curved things. The goal is that the edges of the strip of fabric will align with the edges of the panel after it is all pinned. These steps are shown in the images below. Step 8: Attach waistband to front of skirt Serge along the pinned line so that the strip forms a waistband on top of the panel. Take your time with this, it is tricky to keep the edges aligned and to sew around the curve. Plus on a serger you can not sew over pins so you will need to take them out as you sew along. Once you have finished sewing and folded the waistband up it will look correct. There should be no parts where the fabric is pulling apart. If there are any gaps where the fabric slipped and wasn't sewn just go back over that section. Step 9: Attach waistband to back of skirt Repeat steps 9 and 10 for the back of the skirt. If you made a 3 panel skirt the back two panels should be sewn together (right sides together and serge along the edge) before you attach the waistband. Step 6: Make a waistband Lay one panel out unfolded and measure along the top (hip) arc as best you can with the measuring tape. You could calculate how long this will be but I find that the cutting process always ends up slightly different from the idealized measurement you would get from another equation so I am going to recommend measuring for this step. If you are making a 2 panel skirt do this for each piece. If you are making a 3 panel skirt you will need to do this for the panel that will be the front, but then you will serge together the other two panels for the back and measure the full waistband of the combined panels (it will be about twice as long as what you measured for the front panel). Lay out some of the scrap fabric from making the panels to find a piece large enough for the waistband. You want the waistband to be a rectangle with the long side the length of the top hip arc you just measured and the short side about 3-4 inches as shown in the figure below right. Note- For a 3 panel skirt in order to make the large back panel you will lay 2 of the half circle panels on top of each other with their right sides together (the sides you want showing at the end). Then use a 4 thread overlock stitch on your serger to sew along one of the straight sides (from the hem to the waist arc). Be sure to do a test run with scrap fabric before sewing your skirt panels to test the tension settings and make sure the panels won't pull apart after being sewn together. Step 10: Add elastic
Hold a piece of 3/4 inch elastic around your waist where you want the skirt to sit. Make it as tight as you would want to wear your skirt. Allow for an overlap of about 1/2 inch with the elastic and then cut it. Using a safety pin attached to one end of the elastic, thread it through the waistbands of each of your panels. I find this step is infinitely easier if I attach a piece of chain to the elastic with a safety pin and drop the chain through the waistband to pull the elastic through. Once it is through overlap it as much as needed and sew the elastic ends together. Step 11: Mark hem line While wearing it and standing straight, have a friend mark along the bottom of the skirt where it hits the floor. Step 12: Finishing touches Stitch a rolled hem along the bottom of the skirt where you just marked it to finish it and make it the length you need. Then fray check any serging tails from the waistband attachment and on the ends of the panels where you just sewed the hem. Now put on your sparkly belt and top and shimmy away! Tips and Tricks! 1.) Since the panels will be able to slide along the elastic, you can choose how they fit together. This allows you to choose if you want gaps between the panels or if you want them to touch closely to show no gap. 2.) Layering circle skirts is a great way to get more color and texture in a costume. Having the panels able to slide along the waistband allows you to have greater options for layering since you can also use the gaps to showcase a second skirt underneath. You can use different fabrics (like chiffon over or under satin), or the same fabric in different colors to make your costume more dynamic!
1 Comment
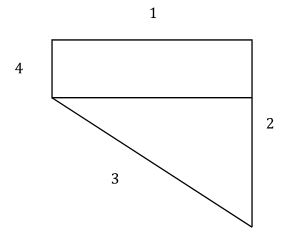
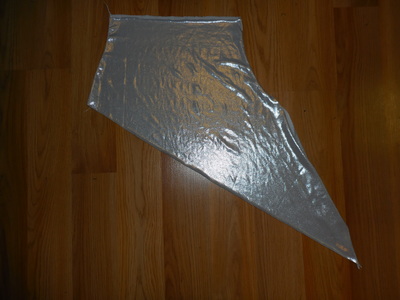
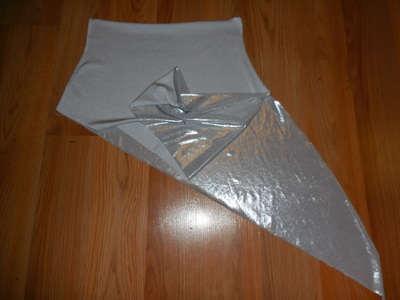
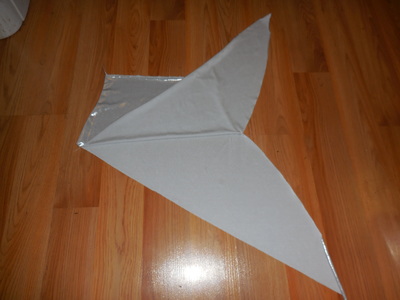
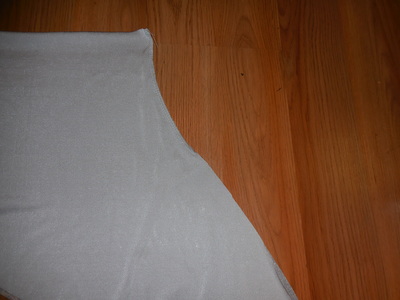
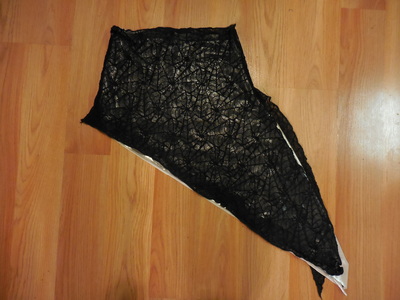
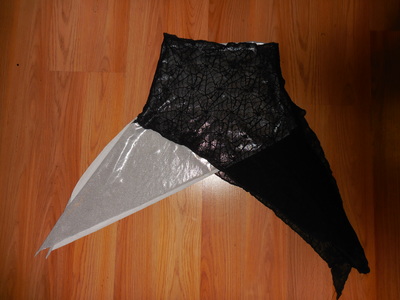
Hip scarves are a great way to add some fun to your practice wear, or as part of your performance costume to add texture or layers of color. You can find different types of hip scarves at various online stores, or even shopping for lace and knitted shawls on Ebay. But, if you want to save some money and customize your own, this is a super easy and quick tutorial that will give you a new hip scarf in 20 minutes! Step 1: Make a quick pattern. The hip scarf is basically 2 identical pieces, with each piece made up of a rectangle with a triangle on the bottom. The sizing of each piece will depend on your hip measurement, how stretchy the fabric is, and how long you want it to hang. Measure around your low hip -- the fullest part of your hip, usually around your bottom-- then subtract a few inches to account for the stretch of the fabric. (This will depend on how stretchy your fabric is—don't be too be conservative! It is much easier to take off more inches if you find it is too big than to add more fabric after cutting it off!) On tracing paper, draw a rectangle with the width measurement you decide for your hips (low hip minus x number of inches), and height enough to cover your bottom. Measure from where you want the top of the hip scarf to sit on your hips (called your upper hip measurement) to how far you want it to cover. Remember—you are naturally curvy, so if you want to make the top of the scarf to cover your whole bottom, make sure to measure over the fullest part of your backside. Then draw a line at a slight diagonal coming out from the bottom corner of one side of the rectangle. Then draw a line from the bottom of that line to the other bottom corner of the rectangle. Your pattern should look something like the image below. Alternatively you can have the bottom part of the rectangle flare out slightly and the point of the triangle extend slightly out to the side at a diagonal depending on how wide your hips are. 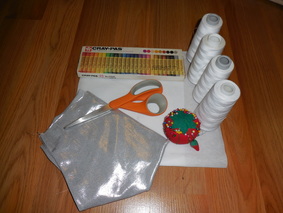 Materials: Fabric- either 2 or 4 way stretch Serger Matching thread Tracing paper Fabric scissors (or really sharp ones) Sewing pins Chalk or craypas Step 2: Prepare your fabric! Trace around the pattern using chalk or a craypas, then flip the pattern over and trace a second piece. Cut out the two pieces of fabric. You could also fold the fabric before tracing and cutting, so that you would cut through both pieces of fabric to create two sides of the pattern. The image on the left below shows what the cut fabric will look like if you slightly flare the bottom edge of the rectangular part that goes over the hips. Step 3: Finish the edges. Serge sides 1-3 with a rolled hem on each piece separately. Step 4: Sew sides together Lay the two pieces on top of each other, with the right sides of the fabric facing each other on the inside as shown in the right hand image above. Some fabric won’t have a clear outside and inside, but others will be important to have the part you want seen when you wear it to be on the inside. Pin sides 2 and 4 together. Serge the scarf together using a 3 or 4 threat overlock stitch, as shown in the right hand image below. Sew sides 4 together. Sew sides 2 together only to where the rectangle part ends and the triangle begins so that it is held together over your hips by the same amount as side 2, and the triangle part is open and flowy. The triangle part has been flipped up in the left hand image below to show approximately how far down side 2 is sewn. Step 5: Try it on, and make adjustments. Turn the fabric inside out, so the right side is now on the outside. Step into the hip scarf and see if it needs to be made smaller. If so, turn the fabric inside out again and serge along side 2 and/or 4 to make the width smaller. Step 6: Final touches! Fray check the edges, and get ready to dance! Styling options:
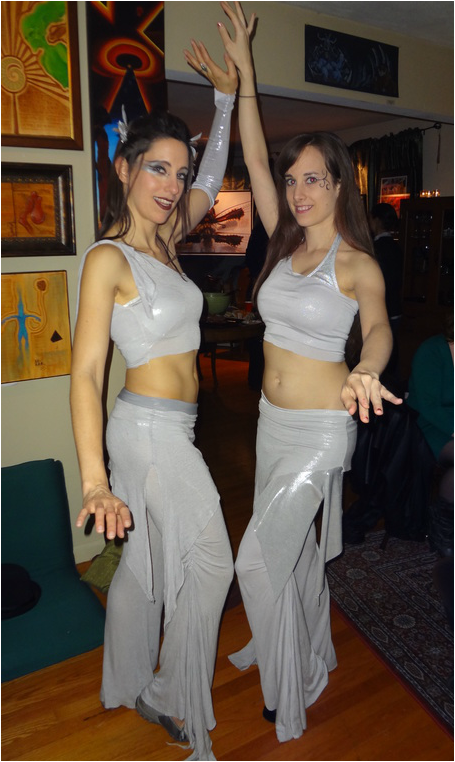
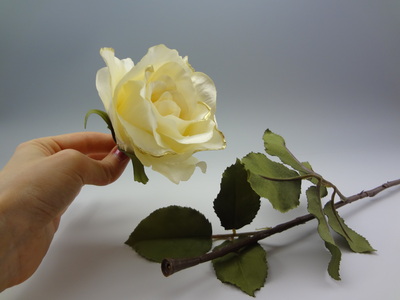
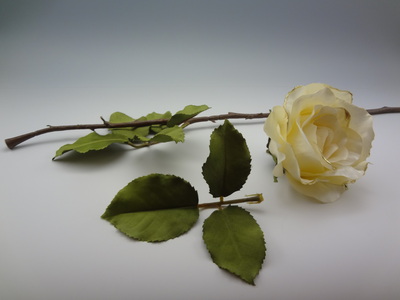
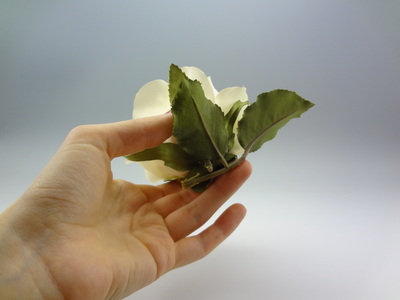
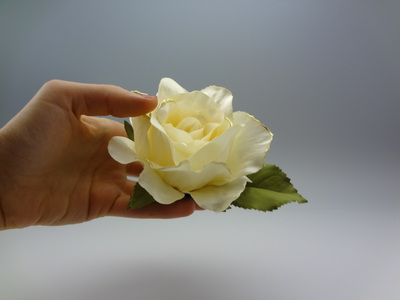
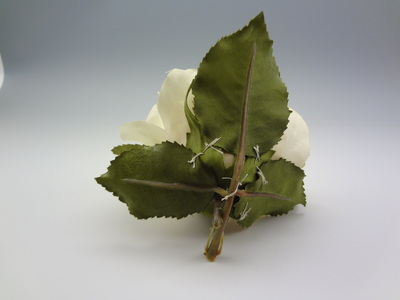
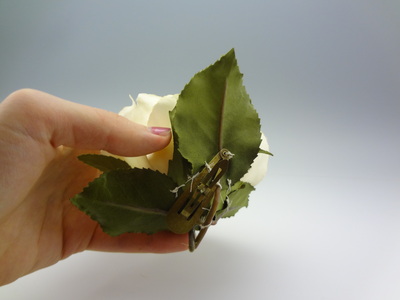
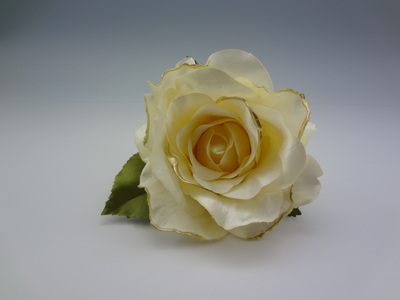
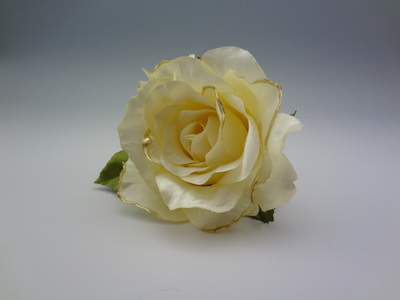
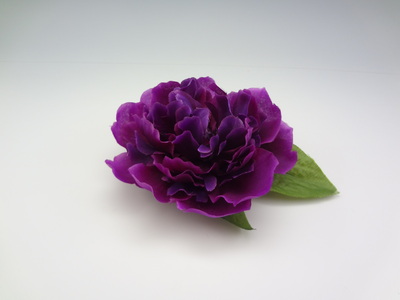
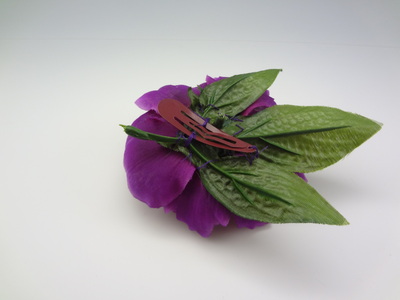
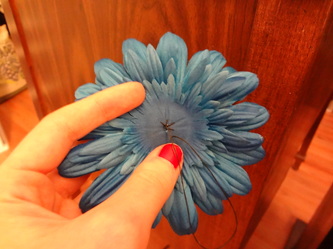
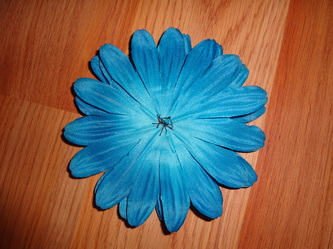
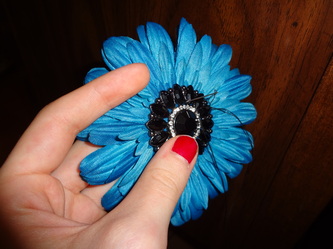
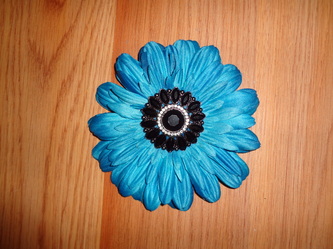
1.) Make one in a bright or sparkly fabric and one in a lace or net to wear over it as in the left hand image above. 2.) Make 2 in complimentary colors and wear them with the triangles on opposites sides of your hips to give color contrast as in the right hand image above. 3.) The same pattern can be used as a top if you consider the waistband part to the the underbust portion and tie the two triangle ends over one shoulder. Felicia and I are wearing layered silver and grey triangle hip wraps with grey tops over silver halters below. 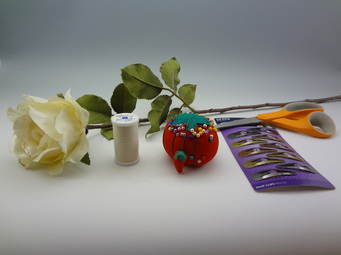 I love wearing flowers in my hair, they are the perfect easy fix when there isn't much time to style it and are great for dance shows or a night out. Plus they are quick and easy to make too! Materials: Flower Needle Thread Scissors Hair Clip Optional: jewels for the center of the flower Step 1: Remove the stem from the flower. Often there is a center piece in the middle of the flower that needs to be removed to pop the stem off. Once this is removed the petals may not stay together so you will need to sew them together by going through the center of the flower where the stem was attached. Some flowers do not have this and can just be popped off the stem and the flower stays intact once removed, the white rose I am using here is that type. Step 2: Decide on the way you want the flower to lay when worn by holding it up to your head. This will allow you to determine which way the clip should face so that the side of the flower you want visible is forward. The clip will go on with the open side facing the back of your head when it is upclipped. Step 2b (Optional): Sometimes I like my clips to have a few leaves on the flower as well. If you would like to have leaves detach one set of leaves from the discarded stem and determine how you want them oriented while determining which way the flower and clip will be oriented. Step 3: Attach the clip by sewing over the two flat sides and through the hole at the end. If you are attaching leaves sew those on before the clip and then sew the clip on top of the leaves. Step 3b (Optional): Sew a small brooch, crystal, or other pretty finding into the center of the flower. Some flower shapes work better for this then others. Roses generally don't work well for this unless it is a very small bead such as a single pearl. Other flowers such as daisies work well with a larger finding or brooch in the center. Step 4: Wear your pretty hair flower for you next dance or night out!
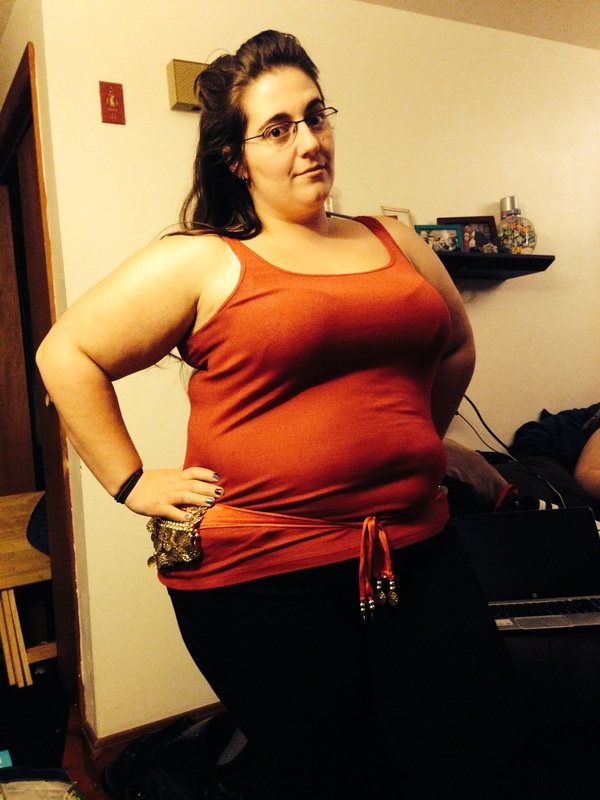
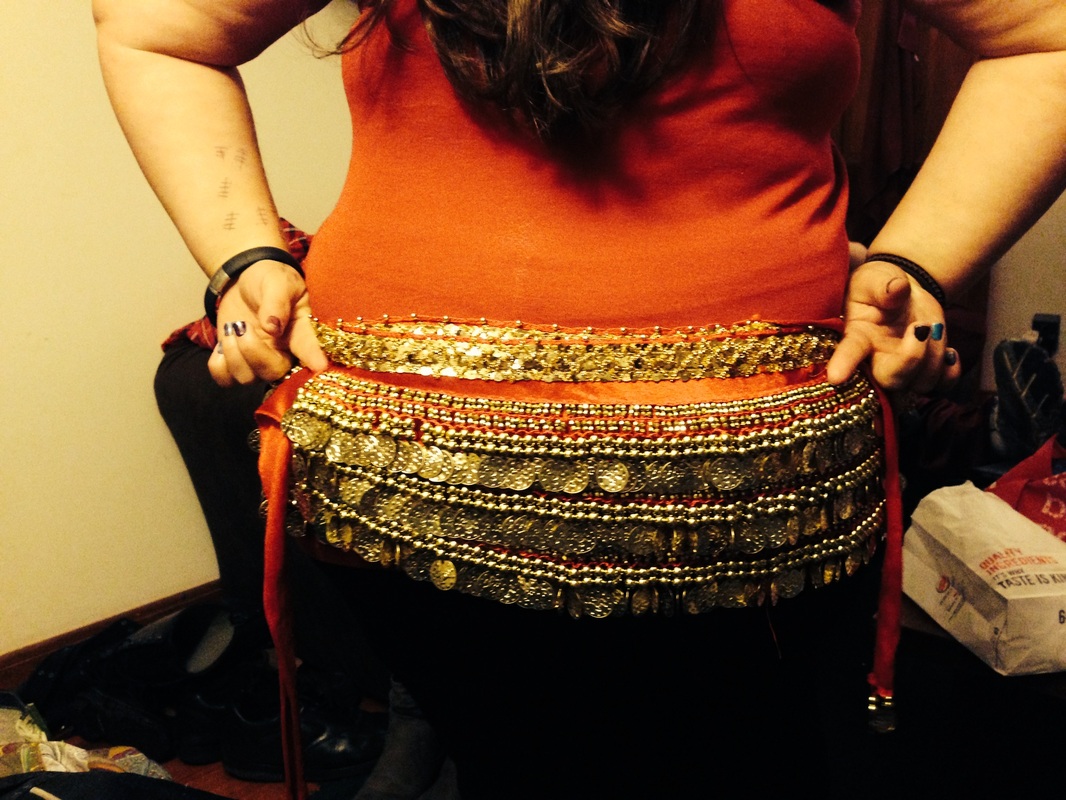
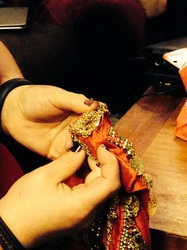
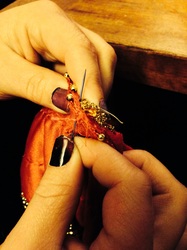
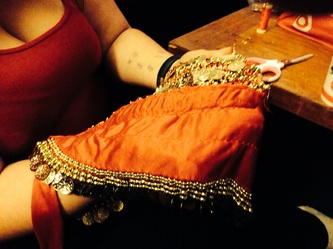
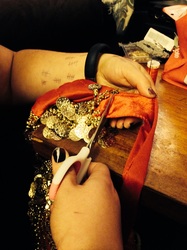
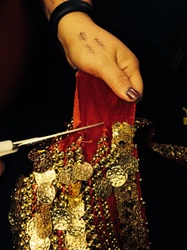
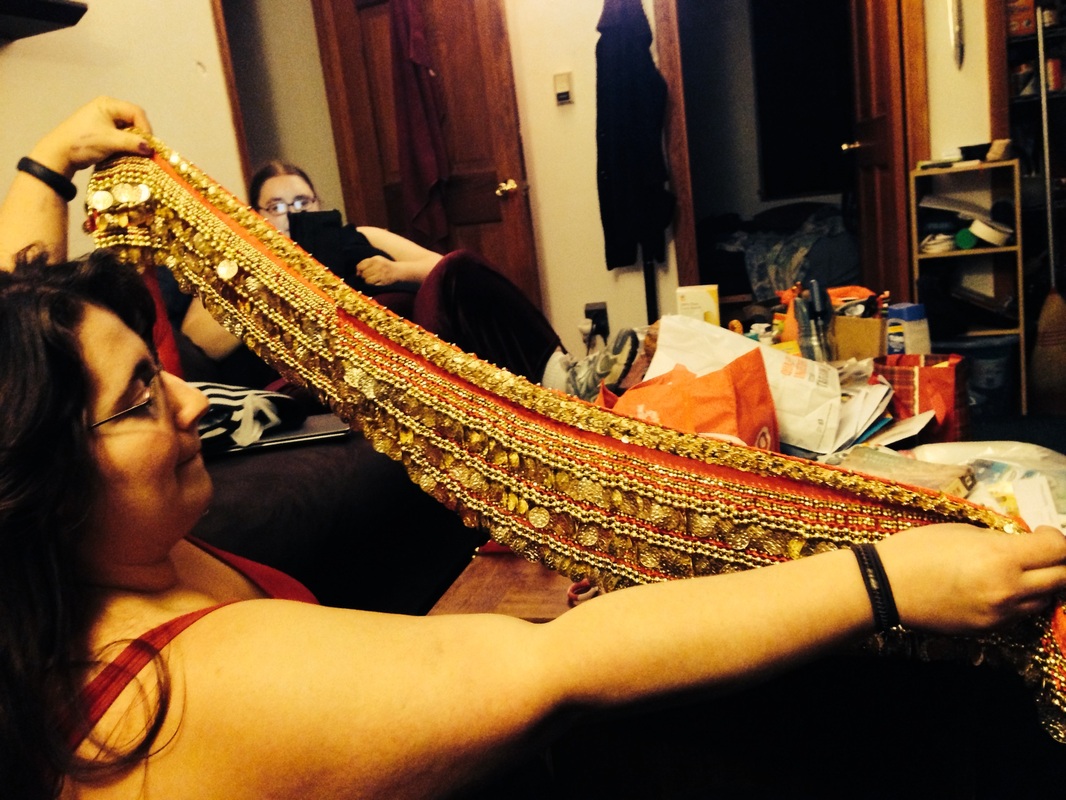
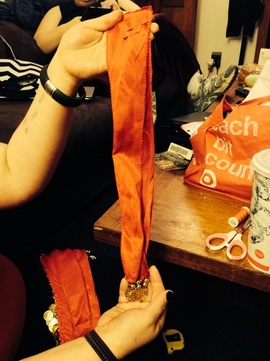
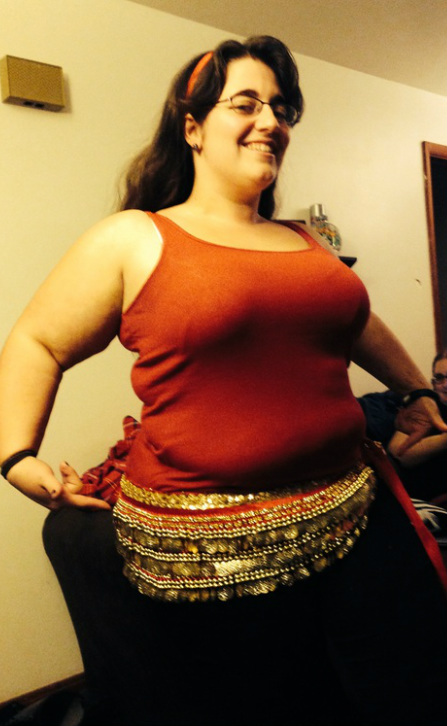
1. Acquire 2 velvet hipscarves. (I've tried the chiffon, but the chiffon takes a lot more work because of the material. It is not very forgiving when it is cut. If you do decide to use the chiffon, make sure you use plenty of Fray-Check.) 2. Place the hipscarves on your hips to see where they line up. You'll want to make sure there's a small gap (about an inch) because once you start dancing, I find that it stretches out a bit (or the knot loosens up) and tends to fall off. Pin the hipscarves together where they overlap. I like to make sure to pin them together at the part where the ties start. 3. Take off the hipscarves and inspect the lines. Sometimes, there are extra decorations and you'll want to line them up as much as possible. The idea here is to make it look like one single hipscarf, not two. 4. I hand stitch these because the area is so small that it would take longer to pull out the sewing machine. a.) Typically, I like to do a basic stitch just under the upper band because it doesn't show as much and will still allow for the coins to move around. b.) Then, I do a quick whip-stitch on the top to help keep things looking neat and tidy (the only bits that I want flopping around are the coins!) Click for larger images and captions: 5. Carefully, remove two of the ties so that you are left with just the normal 2 ties. I try to cut right under the coins so there is no extra velvet hanging out. Save the ties to a make a matching headband! 6. Inspect to ensure that everything is the way you want it to look. It's best to find out now while you still have everything out. Try it on, make sure it's not going anywhere.
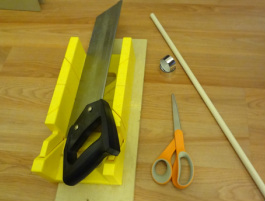
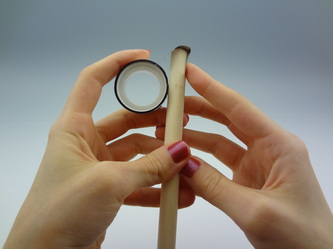
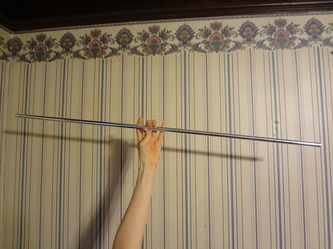
A few years ago I was teaching a cane class where the students had a wide range of heights. We decided to make our own canes for the student showcase. I cut dowels down to the length each student needed so that we could have a cane making party after class one night. One of the students happened to make hula hoops and taught us how to wrap the canes. It was really fun and an affordable way to ensure that students of different heights could easily get a cane that would work for them. In a recent Bhuz thread I was discussing how we made our canes and it seemed like a useful thing to write a tutorial on. Enjoy! Acquiring and Preparing the Cane For making my canes I use wooden dowels from my local hardware store. There are many different diameters to choose from and often a few types of wood as well. Test the various types out in the store (being careful not to hit anything!) to find what will work best for you. Different wood types are more or less dense and heavy so find one that feels like it will be light enough not to stress your wrist. The wood type of mine wasn't labeled but I chose the lightest wood available. I like 1/2” diameter canes, but you can go smaller or larger as you prefer. The standard dowel size is usually 48” long so it will need to be cut down to a usable cane length. Most hardware stores will cut them down for you if you need. If you aren't sure how long you want it have it cut a bit long, test it out, and cut down more as needed. If you have the dowel cut down at the store keep the end they cut off in case you want to try practice wrapping before wrapping your cane. I like my canes to be 38” long, which is the same length I wear in trumpet skirts so that may be a good way to roughly estimate length. I have a miter box and saw at home so I just bought the dowels and cut them down at home. Sand down the ends of the cane before starting to wrap it. Choosing Tape For this cane I used leftover silver metallic hula hoop tape from when we made the class canes. It is 3/4” wide. The larger the width the less times you will be need wrap it around. I think that 3/4" or 1” wide tape would be ideal. 1/2” may be too small, but could be used for adding an accent color if you wanted to make a two tone cane. Hula hoop tapes are available in lots of fun finishes and colors such as holographic, prism, and metallic which makes it easy to match a variety of costumes and create a fun and unique cane. To determine how much tape you will need you can use this handy formula: L=(π*D*C)/(W-O) where, L=length of tape D=diameter of cane C=cane length W=width of tape O= overlap length per wrap This will give you the minimum amount of tape you will need since you will need an extra few inches to cover the ends and more to account for any mistakes or practice wrapping you want to try. Wrapping the Cane
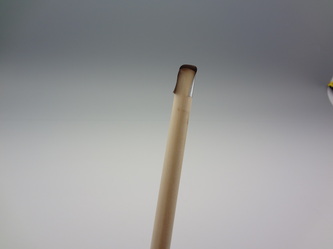
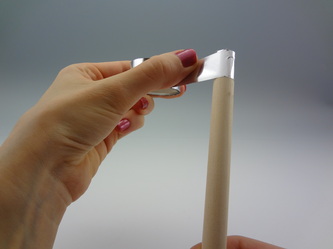
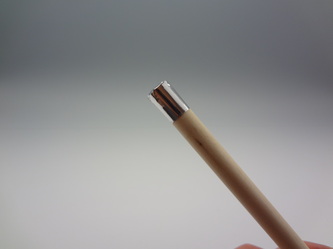
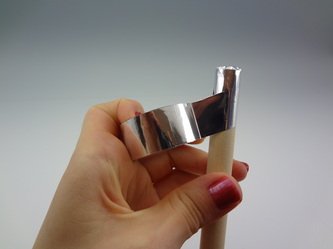
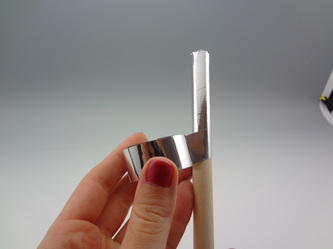
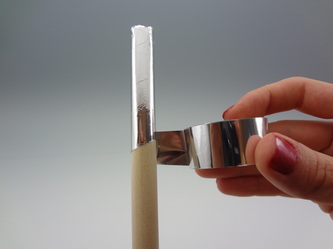
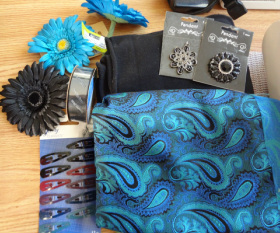
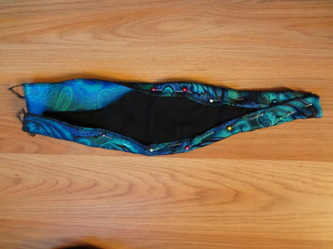
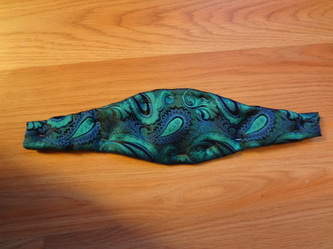
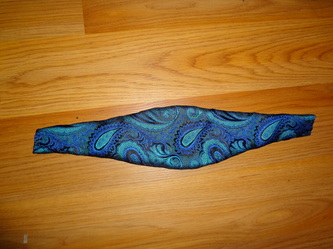
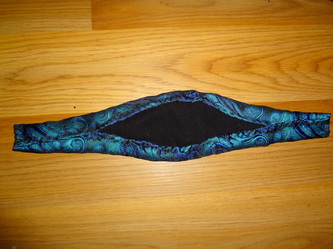
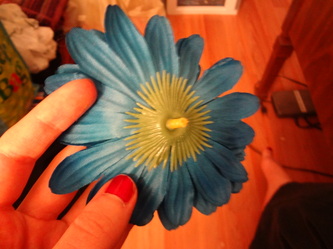
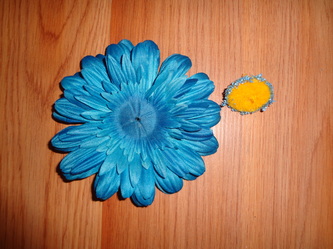
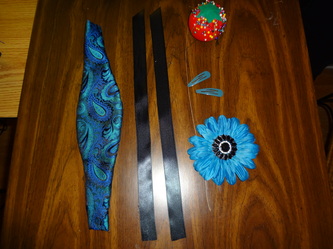
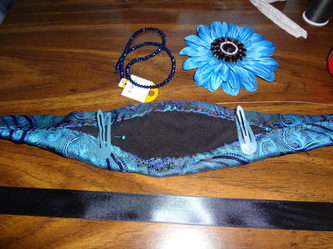
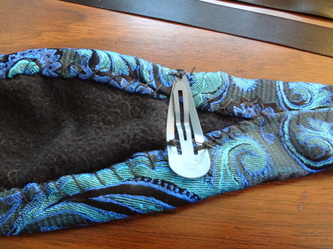
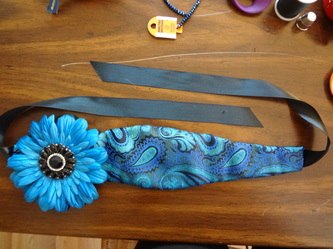
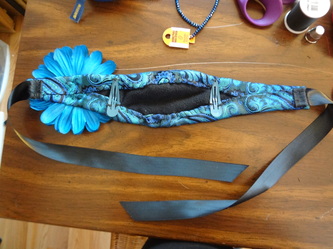
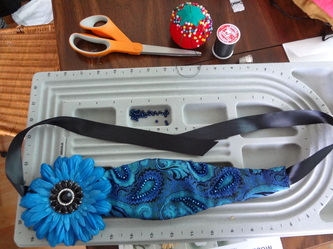
Start by covering both ends. Take an inch or two of hula tape and place it over each end then smooth it down and fold the edges where it overlaps. Wrap another piece of tape all the way around the top to secure down the piece you just used to cover the end. Make sure to do both ends so that once you get to the end of wrapping you will already have that bottom end covered. Now start your wrap with the tape at a diagonal. As you go you want to have the tape overlap the previous wrapped section by about 1/4”. To get the tape to lay smoothly unroll a few inches of tape and hold it tightly to the side then slowly rotate the cane so the tape is applied evenly and unroll more tape slowly as needed. If the tape starts to pucker or gets an air bubble just unwrap that section of cane and redo it. I found the tape I used was easy to unwrap and still sticky enough to hold even if I needed to redo sections. Try to keep a constant amount of overlap on each rotation of the tape. Once the cane is completely wrapped, look it over and press down any sections that need to be smoothed out. Now your cane is ready for dancing! Preparing the Base Measure how long and wide you would like your headband to be. I made mine to stop just behind my ears. I also wanted a wider surface on the top in case I use it for sword balancing. My dance partner Felicia made me a beautiful headpiece for a sword dance we perform and she lined it with fleece which completely alleviated the head pain swords can cause for me. Cut the fleece in the shape you want to the measurements you just made and hold it up to see if it looks the way you want. This will be the base for the rest of the headpiece. Your headband may need darts in the back to help it conform to your head and not stick up in the back. Cut cover fabric with about a ½ inch seam allowance to cover the fleece. I used brocade for mine and serged the edge of the cover fabric first. Pin the cover fabric to the fleece and sew around the edges. This step can be done on a machine but I prefer hand sewing so mine was hand sewn. Preparing the Flower I found a long stemmed fake flower at Michaels that matched my headpiece fabric and costume perfectly. The flower is usually just held to the stem by a short piece of plastic that comes from the center piece of the flower so the stem can just be popped off. The plastic bit that held the stem on won't allow the flower to lay flat against the headpiece and we are going to switch out the center for something more sparkly anyways, so pop the center part of the flower out as well. Now you have the petals remaining. The centerpiece is usually the only thing holding the layers of petals together so you will want to sew the petals together before attaching the new centerpiece. When the petals are sewn together attach the new centerpiece. Pendants or brooches work well for this, but you could also use store bought or homemade appliques. My costume is black and teal and I found a black rhinestone pendant in the shape of a flower to go with my teal flower. I'm pretty excited about it. Adding Fasteners Cut two pieces of ribbon long enough that they will overlap the headband by ½ inch and still be long enough to tie under your hair. Sew these to the two end points of the headband. I used satin ribbon for mine, but it is a bit slippery. I might try organza next time. Depending on your cover fabric you can also use hemmed strips of that fabric as ties. When Felicia first taught me to dance with a sword, one of my fears was not that the sword would slip off my head but that the sword would be perfectly balanced on my headband and the whole darn thing would slide off the back of my head with the sword on it. Felicia taught me that using hair clips sewn inside the headband would ensure that did not happen and sure enough it hasn't. So I recommend adding two hair clips in addition to the ties for extra security. They are positioned one on each side of the headband facing so that when you push it back from your forehead they latch to your hair. I chose teal ones for mine and got them at Target. I know they won't show, but I like knowing that they match anyways. Assembling and Embellishing Now all that is left to do it attach the flower. Try your headpiece on to decide on flower placement. I put mine slightly above my left ear. Jericha uses hot glue to affix hers, but I sewed mine. Add beads or any other decorations you want and then you are done. I ended up beading mine following the paisley pattern of the fabric. It will mean that it is not usable for sword balancing, but it added a little extra sparkle. My skirt dance students used this tutorial to make their headpieces for the Dancing into the Light student showcase. Here are some photos.
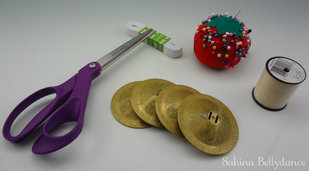
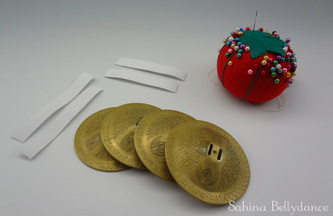
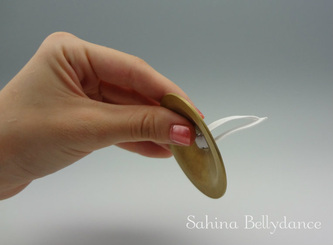
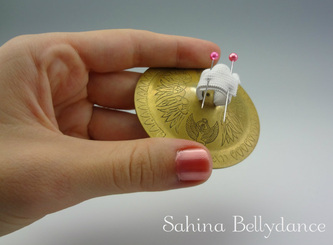
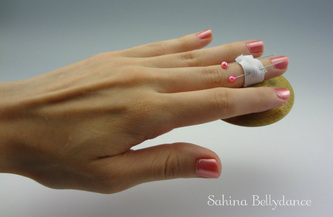
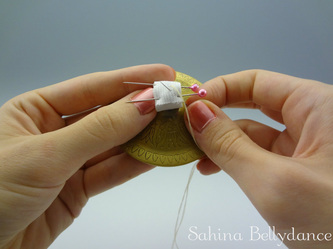
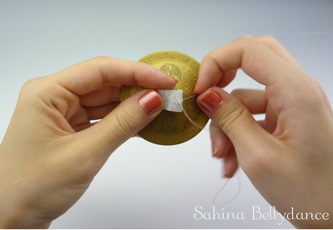
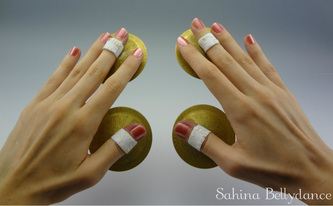
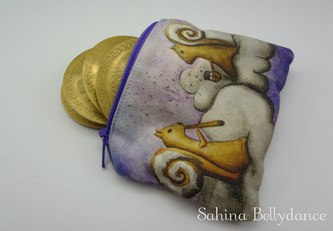
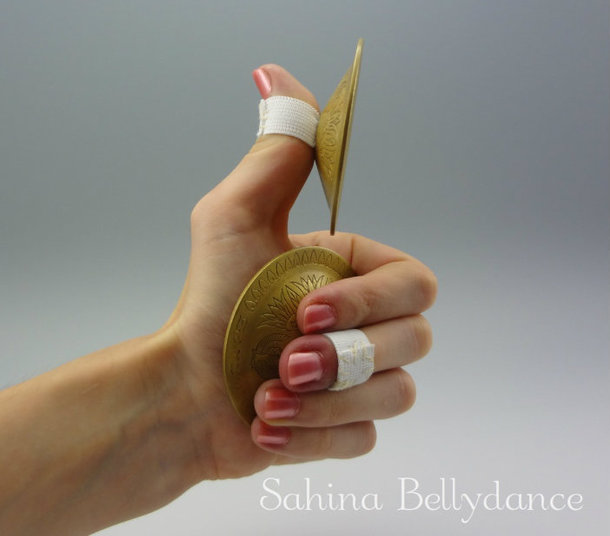
Preparing Materials Thread your needle and cut four pieces elastic down to about an inch longer then needed to wrap around your finger. Two of the elastic pieces are for your thumb zills so be sure to measure those by the circumference of your thumb and the other two by the circumference of your middle finger. If you want you can use different colored elastic or thread for the finger and thumb zills. This can help you tell which is which if you need to put on your zills quickly. Next, put each of the pieces of elastic through a zill so the two ends of the elastic are on the top sides of the zills. If they are on the bottom side it will be harder to sew into the bell of the zill. Also, having the sewn part in the bell can affect the way they are played since the more elastic is on the underside the more likely you are to hit the elastic when playing the zills, thereby accidentally muting them on some hits. Measure and Pin Hold the zill and elastic around your finger and pin it to mark where it feels like a good fit. Take it off and overlap the elastic by 1/4-3/4” and cut off the excess as needed. This is how it will get sewn down so try it on again and do a little hand shimmy to check if it will be secure. You want them to be tight enough that they won't fall off (or go flying off as a zill rocket) but not so tight that they become uncomfortable. Sewing Your zills are now comfortably adjusted and pinned in place with the elastic overlapping. Sew the elastic around the perimeter of the overlap. Try them all on, if everything feels comfortable and secure then you are good to go. Now its time to practice your zill drills and dancing! The zills seen in this post are by Saroyan Mastercrafts. You can get them here. The cute squirrel pouch is handmade by Marcia Furman. You can get one here: http://www.etsy.com/shop/CinamonSquirrel.
|
SahinaMy adventures in dance, music, costume design... Categories
All
Archives
January 2020
|
|
Sahina Bellydance | [email protected]
Amherst MA 01002 | Easthampton 01027 | Northampton 01060. All Content Copyright Sahina Bellydance 2010-2024. All Rights Reserved. |





 RSS Feed
